

How to load test Machine Learning Systems
A practical guide to load testing FastAPI apps with Locust.

In simple terms, load testing is a way to see how well a website, app or system performs when lots of people use it at the same time. It simulates heavy traffic to check if the system stays fast and responsive, or if it slows down and crashes.
But … do I need this for my fancy FastAPI app ready to be deployed? 🤔
Let’s picture this scenario 👇
You’ve built an amazing Music Recommender Application that works perfectly when you test it yourself in production. The backend is responsive, the frontend is smooth, and everything seems flawless!
Speaking of Recommender Systems, have you check out my post on this topic?
A few days later, your app starts getting attention, and the number of users rapidly increases . Suddenly, you're receiving complaints - your app is slow, or worse, it’s not working at all.

What went wrong?
Your server probably handled a few users well but is struggling to keep up with the sudden spike of traffic. Simple as that.
Solution?
You should have run load tests before launching your app to the public.
But don’t worry! Luckily for us there’s a Python library that simplifies load testing: Locust.

Here are three reasons why I think Locust is a great choice:
You define your user test scenarios using Python - no need to learn a new language.
It supports hundreds of thousands of simulated users.
It comes with a web-based UI for easy monitoring.
Now, how about a hands-on project to put this library into action?
Let’s code! 🧑💻
Load Testing a Sentiment Analysis App
To show how to use Locust for load testing ML systems, we'll build a simple Sentiment Analysis app with FastAPI.
You can find the code in this repo, so I suggest cloning it before moving forward!
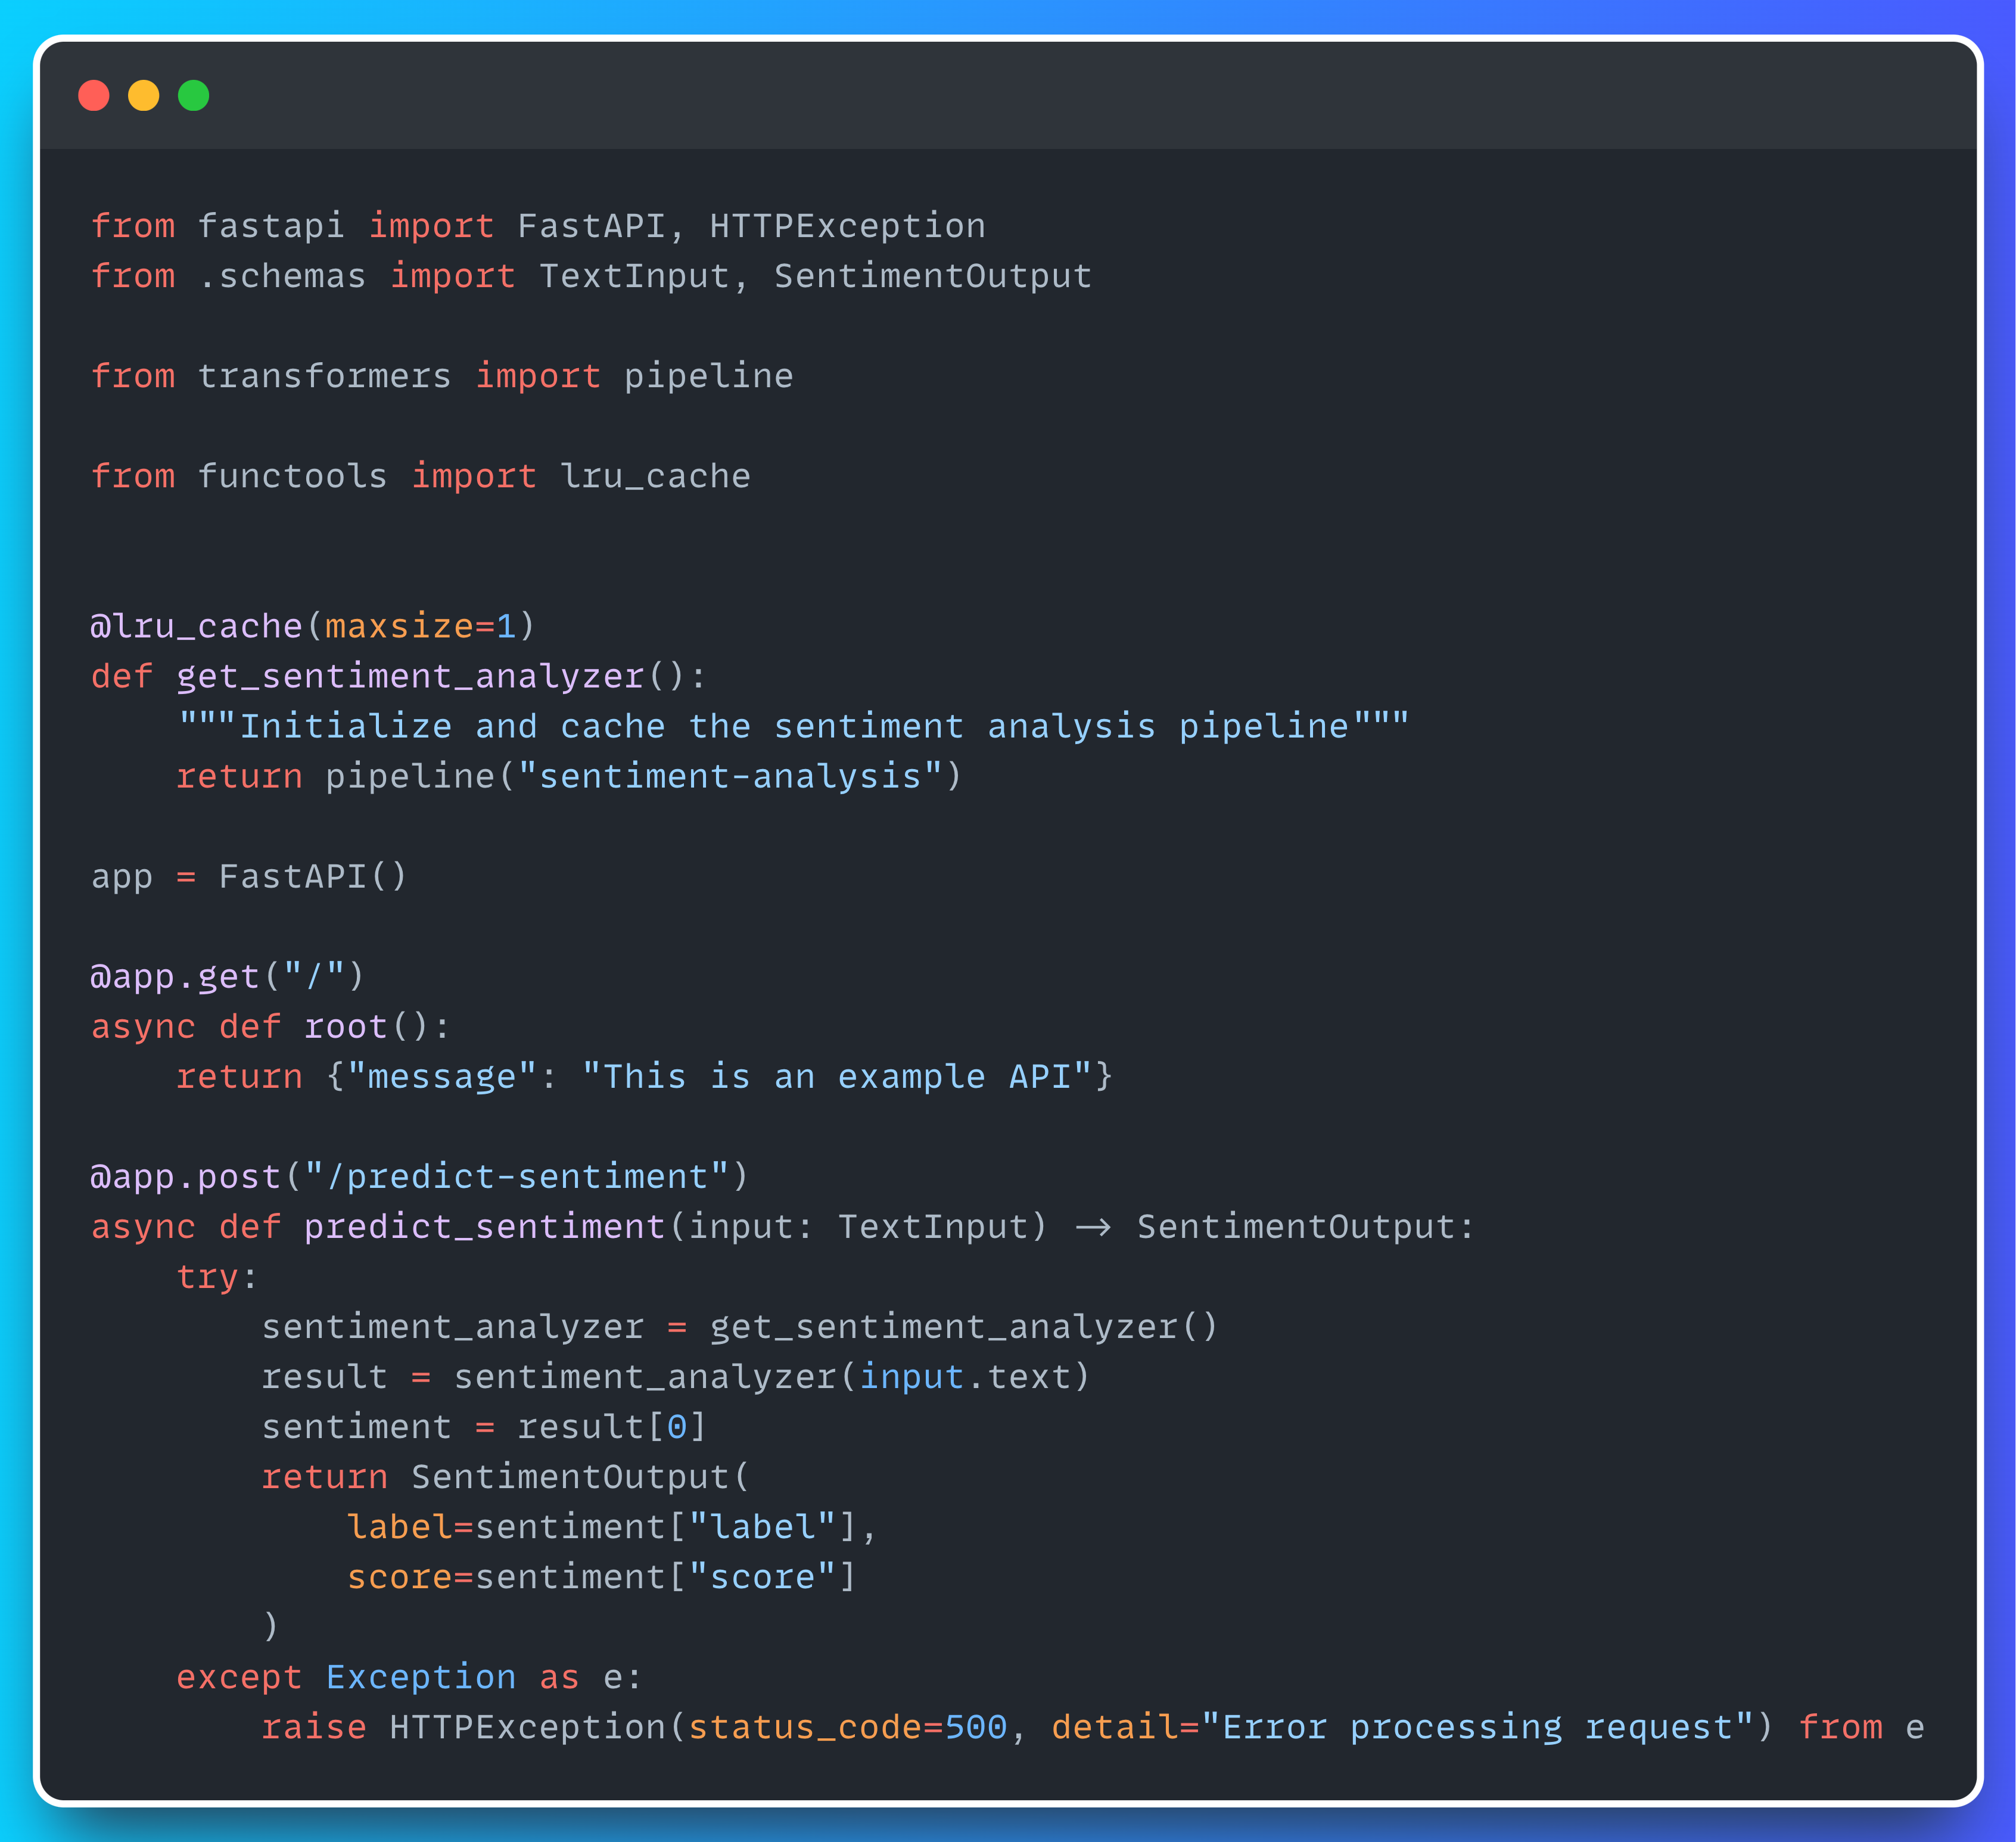
Step 1: The FastAPI application
The app has an endpoint where users will send comments and get a sentiment score back. We’ll use DistilBERT for scoring, hooking it up with a pipeline from the transformers library.
Sounds complicated? Don’t worry - it’s under 40 lines of code! (check out the snippet below)
To get the app running, just use this command:
make api-upThis command spins up the Docker Compose app, making the FastAPI application available at http://0.0.0.0:8000. To check the available endpoints, head to the docs at http://0.0.0.0:8000/docs.
If everything goes smoothly, you should see something like this:

Go ahead and test it out with an example request to see it in action. For instance:
I love reading The Neural Maze articles!
That’s exactly what we expected; a positive comment with a score of almost 1.
Alright, now that the app is up and running, it’s time to use Locust!
Step 2: Setting up Locust
Like I mentioned earlier, one of the best things about Locust is that you can define all your test scenarios in Python. Specifically, you write a locustfile.
Here’s the one we’ll use for this project:

As you can see, it’s pretty straightforward. We are loading a bunch of example comments from a JSON and using these to send requests to FastAPI.
The API requests are controlled by the LoadTestSentiment class, decorating the post_sentiment method with the task decorator. Inside this method, you can see we are randomly selecting one of the comments from the JSON file and sending the POST request to the /predict-sentiment endpoint.
Now that we now what a locustfile is, let’s start Locust!. To do that, just run:
make run-locustThis command will start the Locust UI. Open your browser again and navigate to http://0.0.0.0:8089. The UI will let you set the number of users to simulate and the spawn rate (how many new users to create per second). You’ll also need to provide the host, which in our toy example is just http://0.0.0.0:8000.
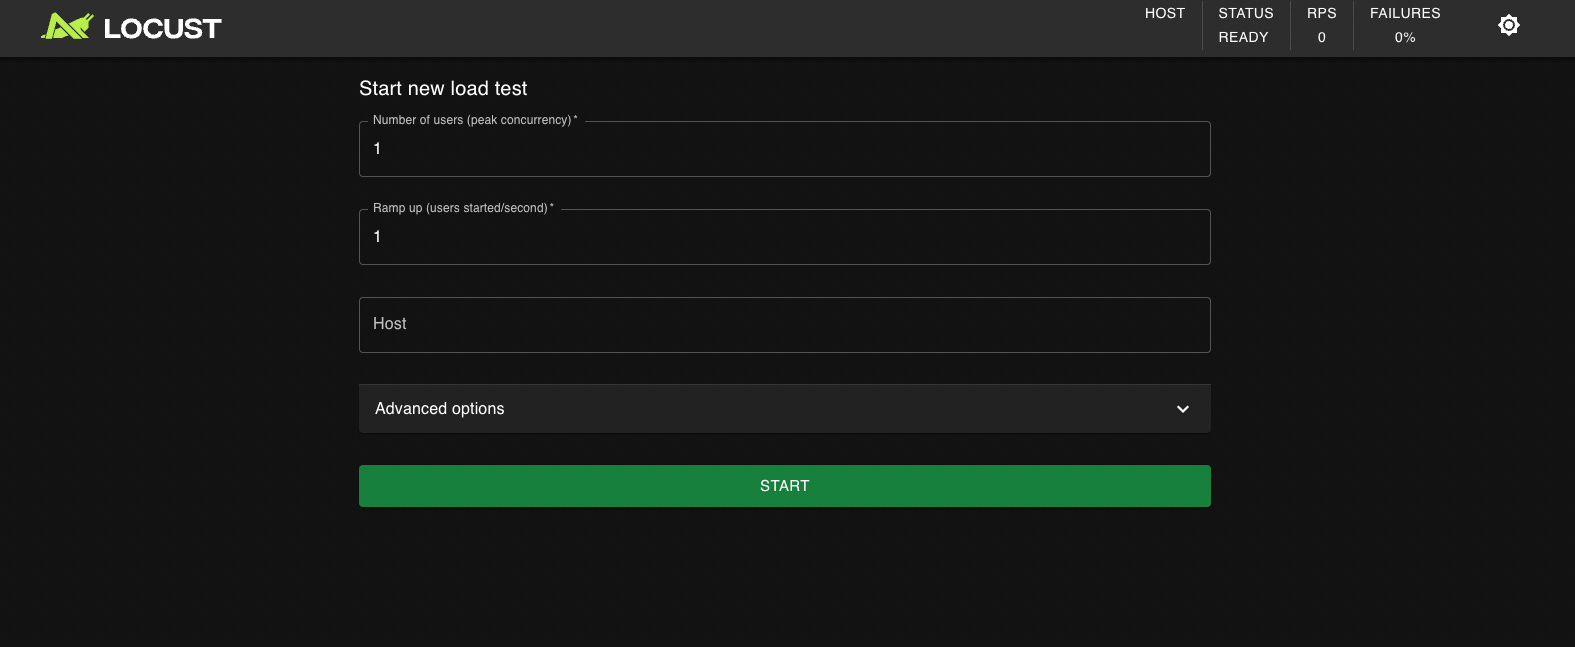
Once you're happy with the parameters, just click the START button!
As soon as you click the button, Locust will start creating the simulated users, with each one running the post_albums task defined in the locustfile. The number of users will keep increasing until it reaches the peak concurrency you set earlier.
Now, it’s time to monitor the results.
Step 3: Monitoring your application
The Locust dashboard provides various real-time statistics, and the one I usually focus on is the Charts tab, which includes the following metrics:

Requests per second (RPS): This metric can vary greatly depending on the application. It's important to estimate this value to make your simulations realistic. For example, the RPS for a trading app will be much higher than for an app used to book padel courts in my hometown.
Response time: It tracks how long the API takes to respond. As we saw earlier, even if your app is blazing fast with 100 users … what happens when you increase to 1,000 or even 10,000?
Failure rate: It shows the error rates, indicating if any requests fail.
And that’s everyhting for today!
I hope you’ve learned something new from this article and that you’ll always remember to run load tests before deploying to production.
Before I forget, if you prefer video lessons, you can also check out my YouTube video covering Locust!
Happy deployments, and I’ll see you next Wednesday! 🫡
I read it all the way through, and I have to say I absolutely love this! Super informative. I’m excited to implement it in my projects as well. Btw I had no idea you could do this with models.I always thought it was just a web app feature😂. What a surprise!
I need this!