How to build production-ready Recommender Systems
An overview of the 4-stage Recommender System Design

Since I started working as a Machine Learning Engineer, I’ve worked on all kinds of problems: time series forecasting, computer vision tasks, speech recognition systems, price optimization algorithms, etc.
But if I’m being honest, the ones I’ve enjoyed the most are Recommender Systems. Whether it’s for banks or fashion retailers, I love seeing how these systems directly impact customers, making their experiences smoother and more personalised.
That’s why, today, I want to share a powerful framework you should always keep in mind when building real-world Recommender Systems: the 4-stage design.
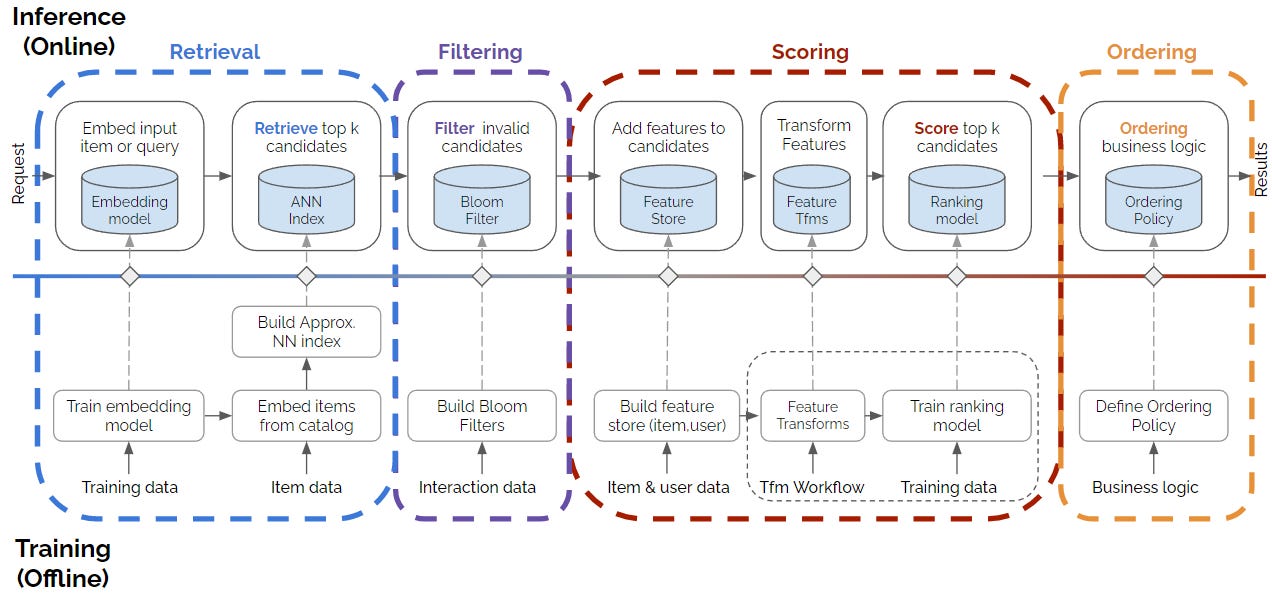
This design was first introduced by Even Oldridge and Karl Byleen-Higley three years ago as an improvement over the earlier 2-stage design, which Eugene Yan described in this article.
The 4-stage design has four main stages / steps (obvious, right? 🤣). Let’s break them down!
Stage 1: Retrieval (Candidate Generation)
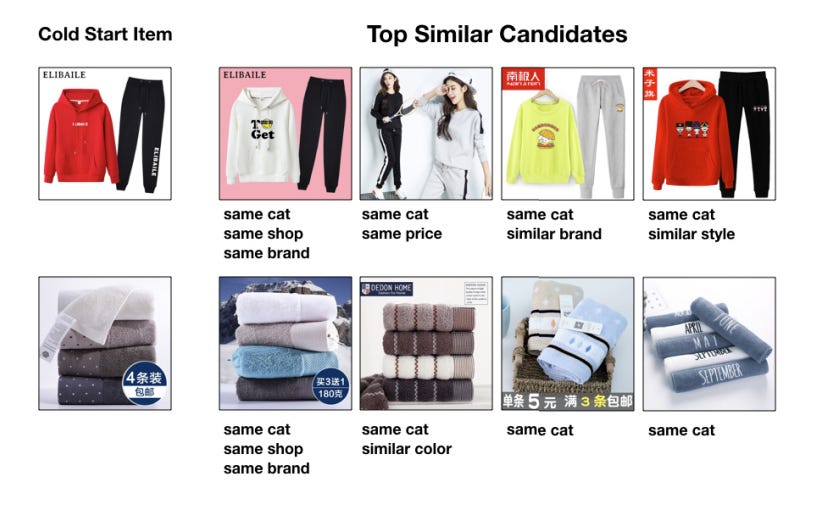
Think about YouTube - do you think its recommender system scores every single video for every user? No way. That would be way too slow (and expensive!).
Instead, platforms like YouTube, Spotify, or Amazon start by narrowing down their massive catalogs - from millions (or even billions) of items - down to just a few hundred potential candidates. This is the retrieval phase.
Most modern recommender systems handle retrieval using embedding models. These can range from simple methods like Word2Vec or Matrix Factorization to more advanced approaches involving graph embeddings or complex neural network architectures.
But here’s the key thing to remember: this phase prioritizes speed over accuracy. We need a fast and efficient way to generate decent candidates, but these aren’t the final recommendations. The real scoring happens later in the scoring phase.
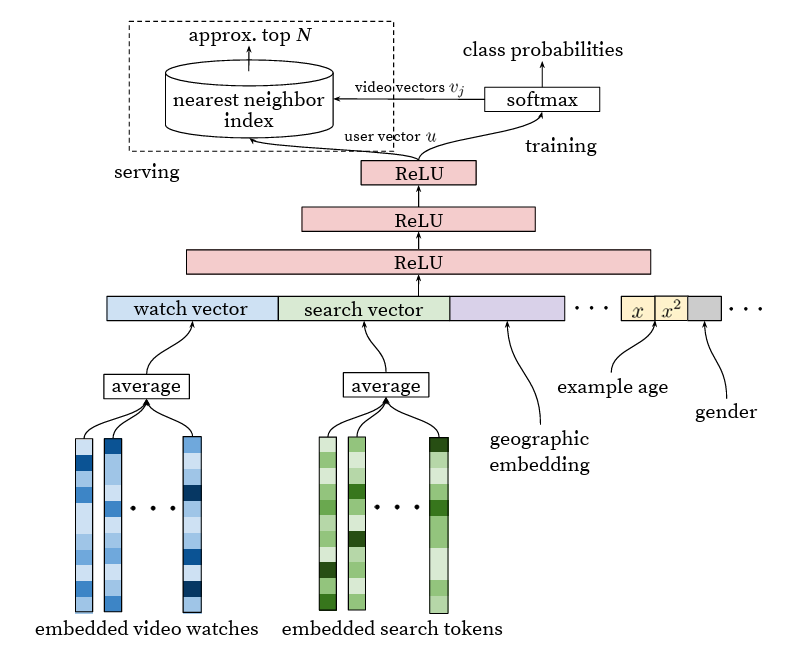
The Candidate Generation stage can be split into two phases: Offline and Online.
Offline phase
In this phase, you’ll train the embedding model and use it to generate embeddings for every item in your catalog - whether it’s movies, songs, or t-shirts. These embeddings are then stored in a Vector Database (or an ANN index) for fast retrieval later. The key is to ensure both the embedding model and the Vector DB are easily accessible for the next phase.
Online phase
When a user interacts with an item (like watching a YouTube video), the system generates an embedding for that item on the fly. It then pulls the top-k most similar items from the vector database - these are basically the candidates.
From there, this shortlist of candidates moves to the Filtering stage.
Stage 2: Filtering

I know the filtering stage isn’t as flashy as the retrieval stage, but it’s just as important. This is were you’ll filter out candidates that don’t fit certain rules.
Think of it like this: removing songs the user has already played or skipping movies with violent scenes that aren’t kid-friendly.
You can do this with algorithms like the Bloom Filter, or just use the built-in filtering features of Vector DBs (honestly, that’s what I do 😅).
Once that’s done, it’s time for the real heavy lifting: the scoring stage.
Stage 3: Scoring
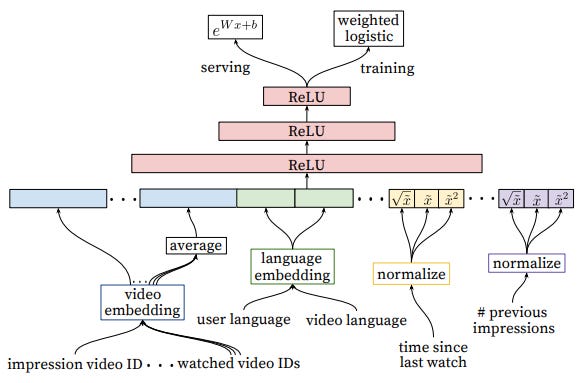
As I was saying, the scoring stage is where the heavy lifting happens. It takes the list of candidates and assigns a score to each one, so they can be ranked and ready to show to the user.
Training a ranker model isn’t a walk in the park - you’ll need to bring out all your ML Engineering and Data Science skills for this one.
During the Offline phase, you’ll typically generate tons of features (feature engineering) for both items and users and store them in a Feature Store. Then, you'll use this data (along with the embeddings, in most cases) to train a powerful model that produces accurate ranking scores: the scorer model.
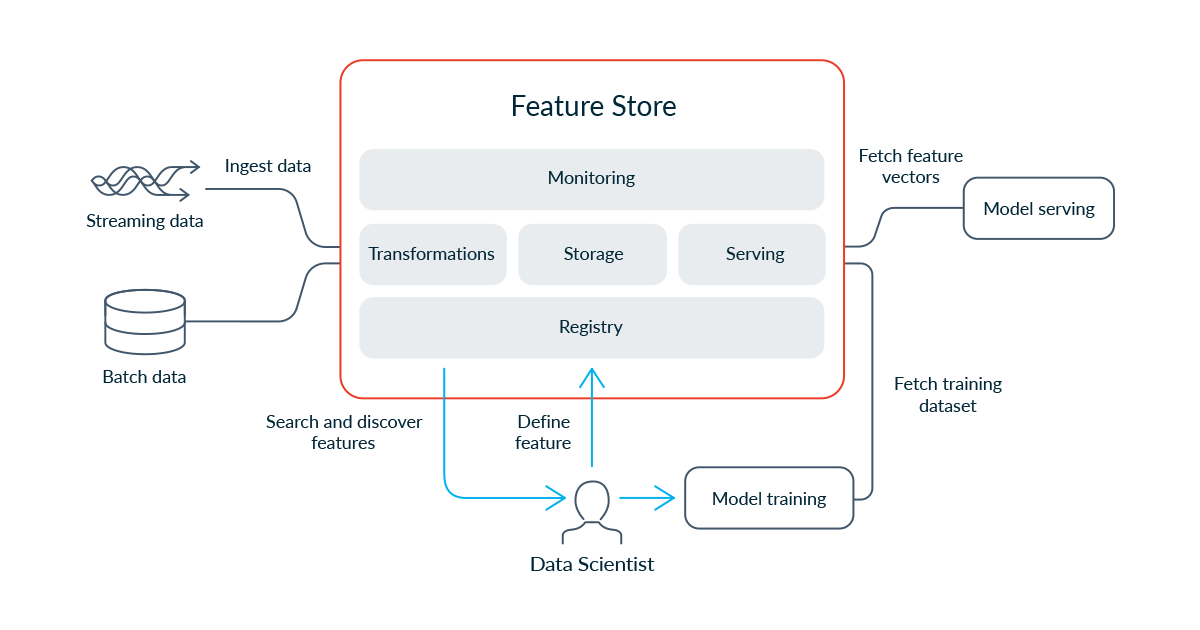
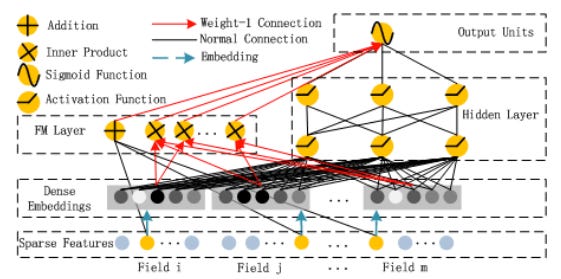
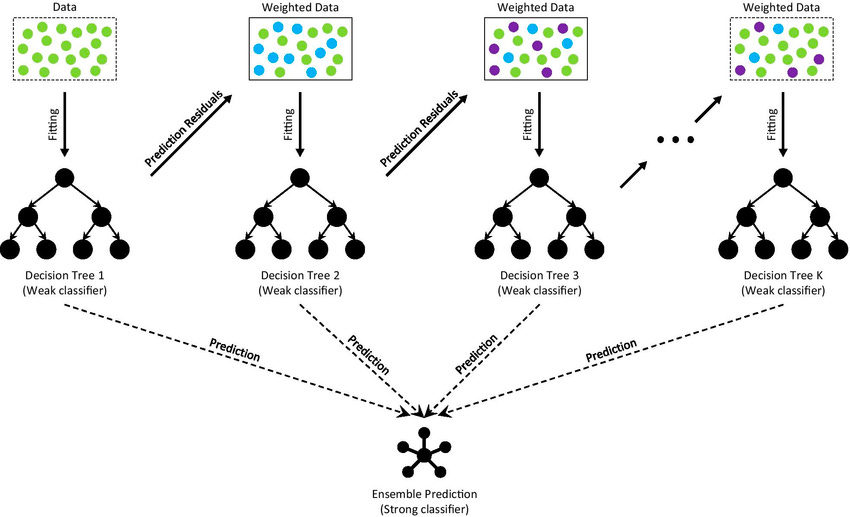
Scorer models come in all shapes and sizes - from Factorization Machines and Neural Collaborative Filtering to Deep Factorization Machines or Tree-based algorithms, like XGBoost or Gradient Boosting.
During the online phase, the scorer model assigns scores to the candidates, ranking them from best to worst. Then, you’ll take a subset of the top recommendations - if you start with 200 candidates, you might keep around 10 to 20 items.
Now that we’ve got our final shortlist, it’s time for the last step: the ordering stage!
Stage 4: Ordering (Business Layer)
Finally, we have the ordering stage (or business layer), where business-specific rules adjust the ranking from the scorer model.
For example, in e-commerce, you might boost heavily discounted products to make them more visible, adjusting the ranking scores from the scorer model to fit business needs.
After this step, the user gets a refined list of videos to watch, songs to play, or t-shirts to buy! 🎉🎉🎉
Wait! The post isn’t over yet! Now that you understand the 4-stage design, it’s time for a hands-on exercise. Check out the section below!
Homework: Music Recommender System
To help you really get all the concepts, let’s put them into practice with a little “design experiment.” Imagine you’re in a tough interview, and the interviewer throws this at you:
“Tell me, how would you design a Music Recommender System like Spotify?”
At first, panic sets in. But then, you remember your good old friend Miguel and his article on the 4-stage design.
Before you keep reading, try sketching the system diagram yourself! System design is a crucial skill for ML / AI Engineers - and (at least for now) something LLMs aren’t great at 😅.
Done? Awesome. Now, here’s the diagram I’d propose to that tricky interviewer.
Alright, let’s break down what’s happening in the diagram.
The first thing you’ll notice (1) is Miguel listening to a masterpiece - “Hey Jude” by The Beatles. While he’s enjoying the song, our Music Recommender System is already hard at work. The moment Miguel hits play, our embedding model (e.g., a simple collaborative filtering model like Matrix Factorization) generates an embedding for Hey Jude.
Then, this embedding (3) is matched against the vector database (I’m throwing some options at the interviewer, like Qdrant, Pinecone or MongoDB), retrieving a set of candidate songs (4). Inside the dotted circle on the right, we have tracks “similar” to Hey Jude (maybe “Let It Be”? who knows).
Now comes the filtering stage, where we apply bloom filters to remove songs Miguel has already listened to. We’ll also filter out any reggaeton that sneaked in (5) -sorry reggaeton fans 😆.
Next (6), we enrich our candidates with extra info - album covers, song descriptions, genre, album name, play count, etc. Finally, in (7), we let our scoring model work its magic. I’m leaning toward a tree-based algorithm for this one, like GBT.
The scorer model’s output is a sorted list of the best song recommendation for Miguel - but we’re not done yet! We still need to apply some business logic (8).
Imagine Radiohead just dropped a new album and is paying our system for promotion. If their latest banger lands in second place - just behind a Pink Floyd masterpiece - we might need to tweak the final rankings, boosting Radiohead and nudging Pink Floyd down a bit.
Finally, at (9), we show the recommendations to Miguel … who will probably click Pink Floyd anyway. No offense, Radiohead.
If you’ve made it this far, you’ve got a solid grasp of the 4-stage recommender design!
Now, I’ve got a question for you:
Would you be interested in a real-world implementation of this? Not just a design exercise, but something you can actually run with detailed articles, videos, and step-by-step guides?
Let me know what you think!
Have an awesome week (come on, it’s already Wednesday!), and I’ll see you around, friend 👋


Real life example would be great. Maybe with a github repo so we can fork and evolve.
Awesome post Miguel! 🚀 As a student very inclined to the world of AI & ML entering the industry, this is very helpful. Would definitely like watching or working on a hands-on implementation of projects like these!