


The power of Embeddings: Twin Celebrity App
Turning into an embedding to find your celebrity lookalike

A few months back, I created a project called the “Twin Celebrity App”, an ML-based application that uses face embeddings and vector similarity search to find celebrity lookalikes. In this post, I’ll talk about the project’s design, key components, and some of the challenges I encountered along the way.
Oh, and if you’re curious, let me reveal my celebrity twin. Spoiler alert … it’s Brad Pitt! Just kidding - wishful thinking.
My actual celebrity twin is Mr. Andy Samberg 👇

This project has its own repository, which you can check out here. I recommend cloning the repository and following along as you read this post, as I’ll be referencing the code there from time to time.
Project Design

The diagram above illustrates the project's architecture, which is divided into two main components:
💠 Embedding Generation Pipeline (offline)
💠 Streamlit Application (online)
Let’s explore each component in detail 💪
Embedding Generation Pipeline

The embedding generation pipeline is responsible for extracting face embeddings from the celebrities images. It uses the FaceNet architecture in combination with an MTCNN model for facial recognition - check the amazing facenet-pytorch library!

Once the embeddings are created, they are stored in Qdrant. The entire pipeline is orchestrated using ZenML, consisting of the following steps:
Load the dataset (Step 1): The dataset is loaded from a Hugging Face dataset - in particular, we are using lansinuote/simple_facenet.
Sample the dataset (Step 2): The dataset is sampled to reduce the number of embeddings to process.
Generate / Store the embeddings (Step 3): The embeddings are generated and stored in Qdrant.
If you are curious about each step, take a look at the implementation here.
To integrate these three steps, we’ll build the ZenML pipeline, as you can see below.
After that, we can simply run the ZenML pipeline and wait for all the embeddings to be stored in Qdrant. For all the details on setting up environment variables, ZenML Cloud, and Qdrant Cloud, be sure to check the repository.

Once the pipeline finishes, you can go to your Qdrant Cloud instance to confirm that all the embeddings have been successfully stored.
Actually, you can also verify the accuracy of the FaceNet embeddings by ensuring the clusters align with expectations . For instance, as shown in the image above, there is a cluster under the cursor that groups all the images of Jeremy Renner.

Now that we have all the embeddings in Qdrant, let’s move to the Streamlit Application.
Streamlit Application
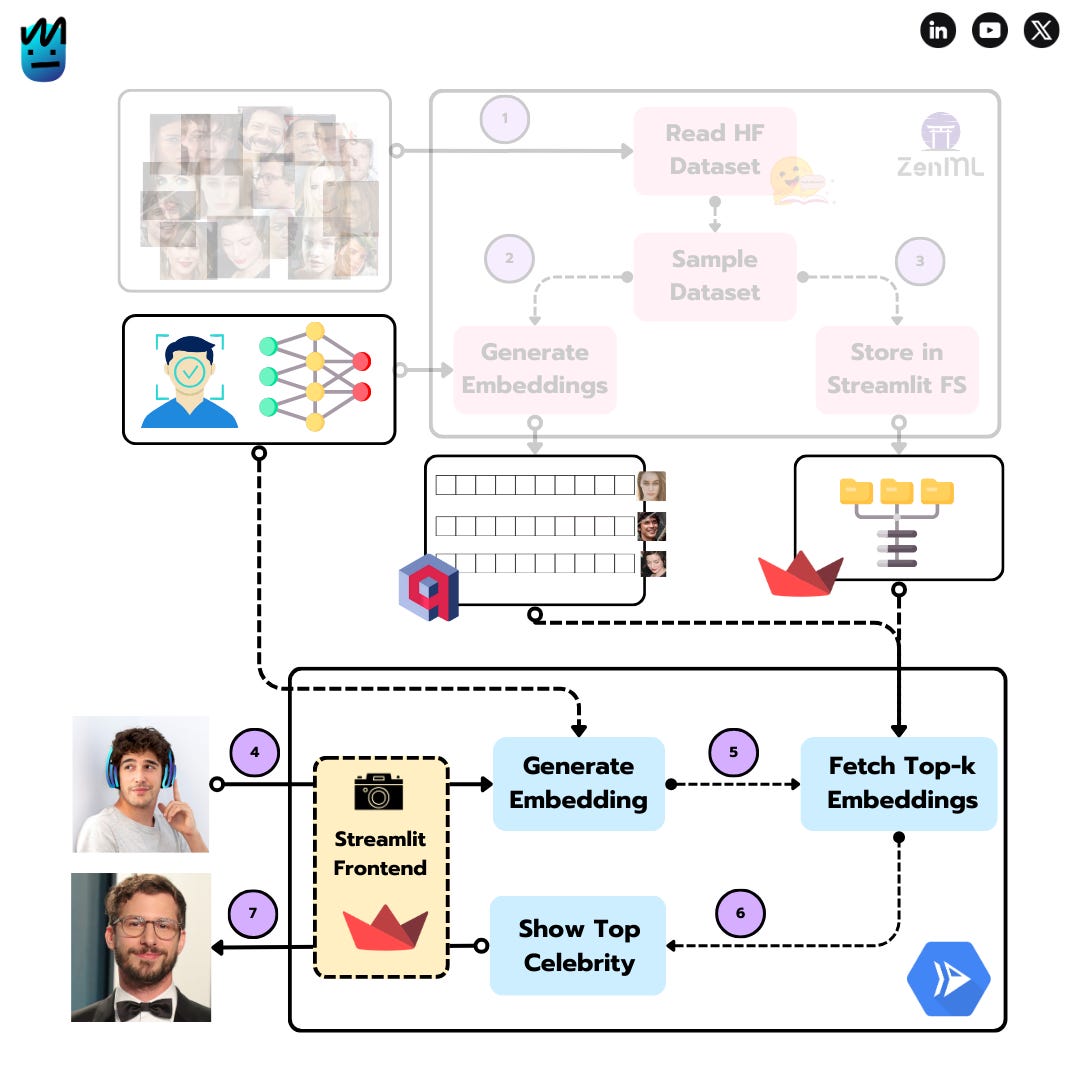
Streamlit serves as the user interface for the app. It enables users to upload an image, search for the closest celebrity lookalike, and display the results. The cool thing about this UI is that it allows you to use your camera as input! - thanks to Streamlit’s st.camera_input function, which makes it simple to implement.
You can find the full Streamlit code here.
While running this code locally is possible, I believe it’s more valuable to explain how to deploy it to the cloud. For this, I’ve chosen Google Cloud Platform, specifically Google Cloud Run.
Here’s the Dockerfile we’ll be using:

Now that we know how to build the Docker image for the Streamlit app, it’s time for the final touch: automating the process of building the image, uploading it to Google Cloud Artifact Registry, and starting the Cloud Run service.
We can accomplish this quite easily using a service called Cloud Build, a serverless CI/CD platform that integrates seamlessly with all GCP products. In the repository, you’ll find a build.yaml file with the following content.
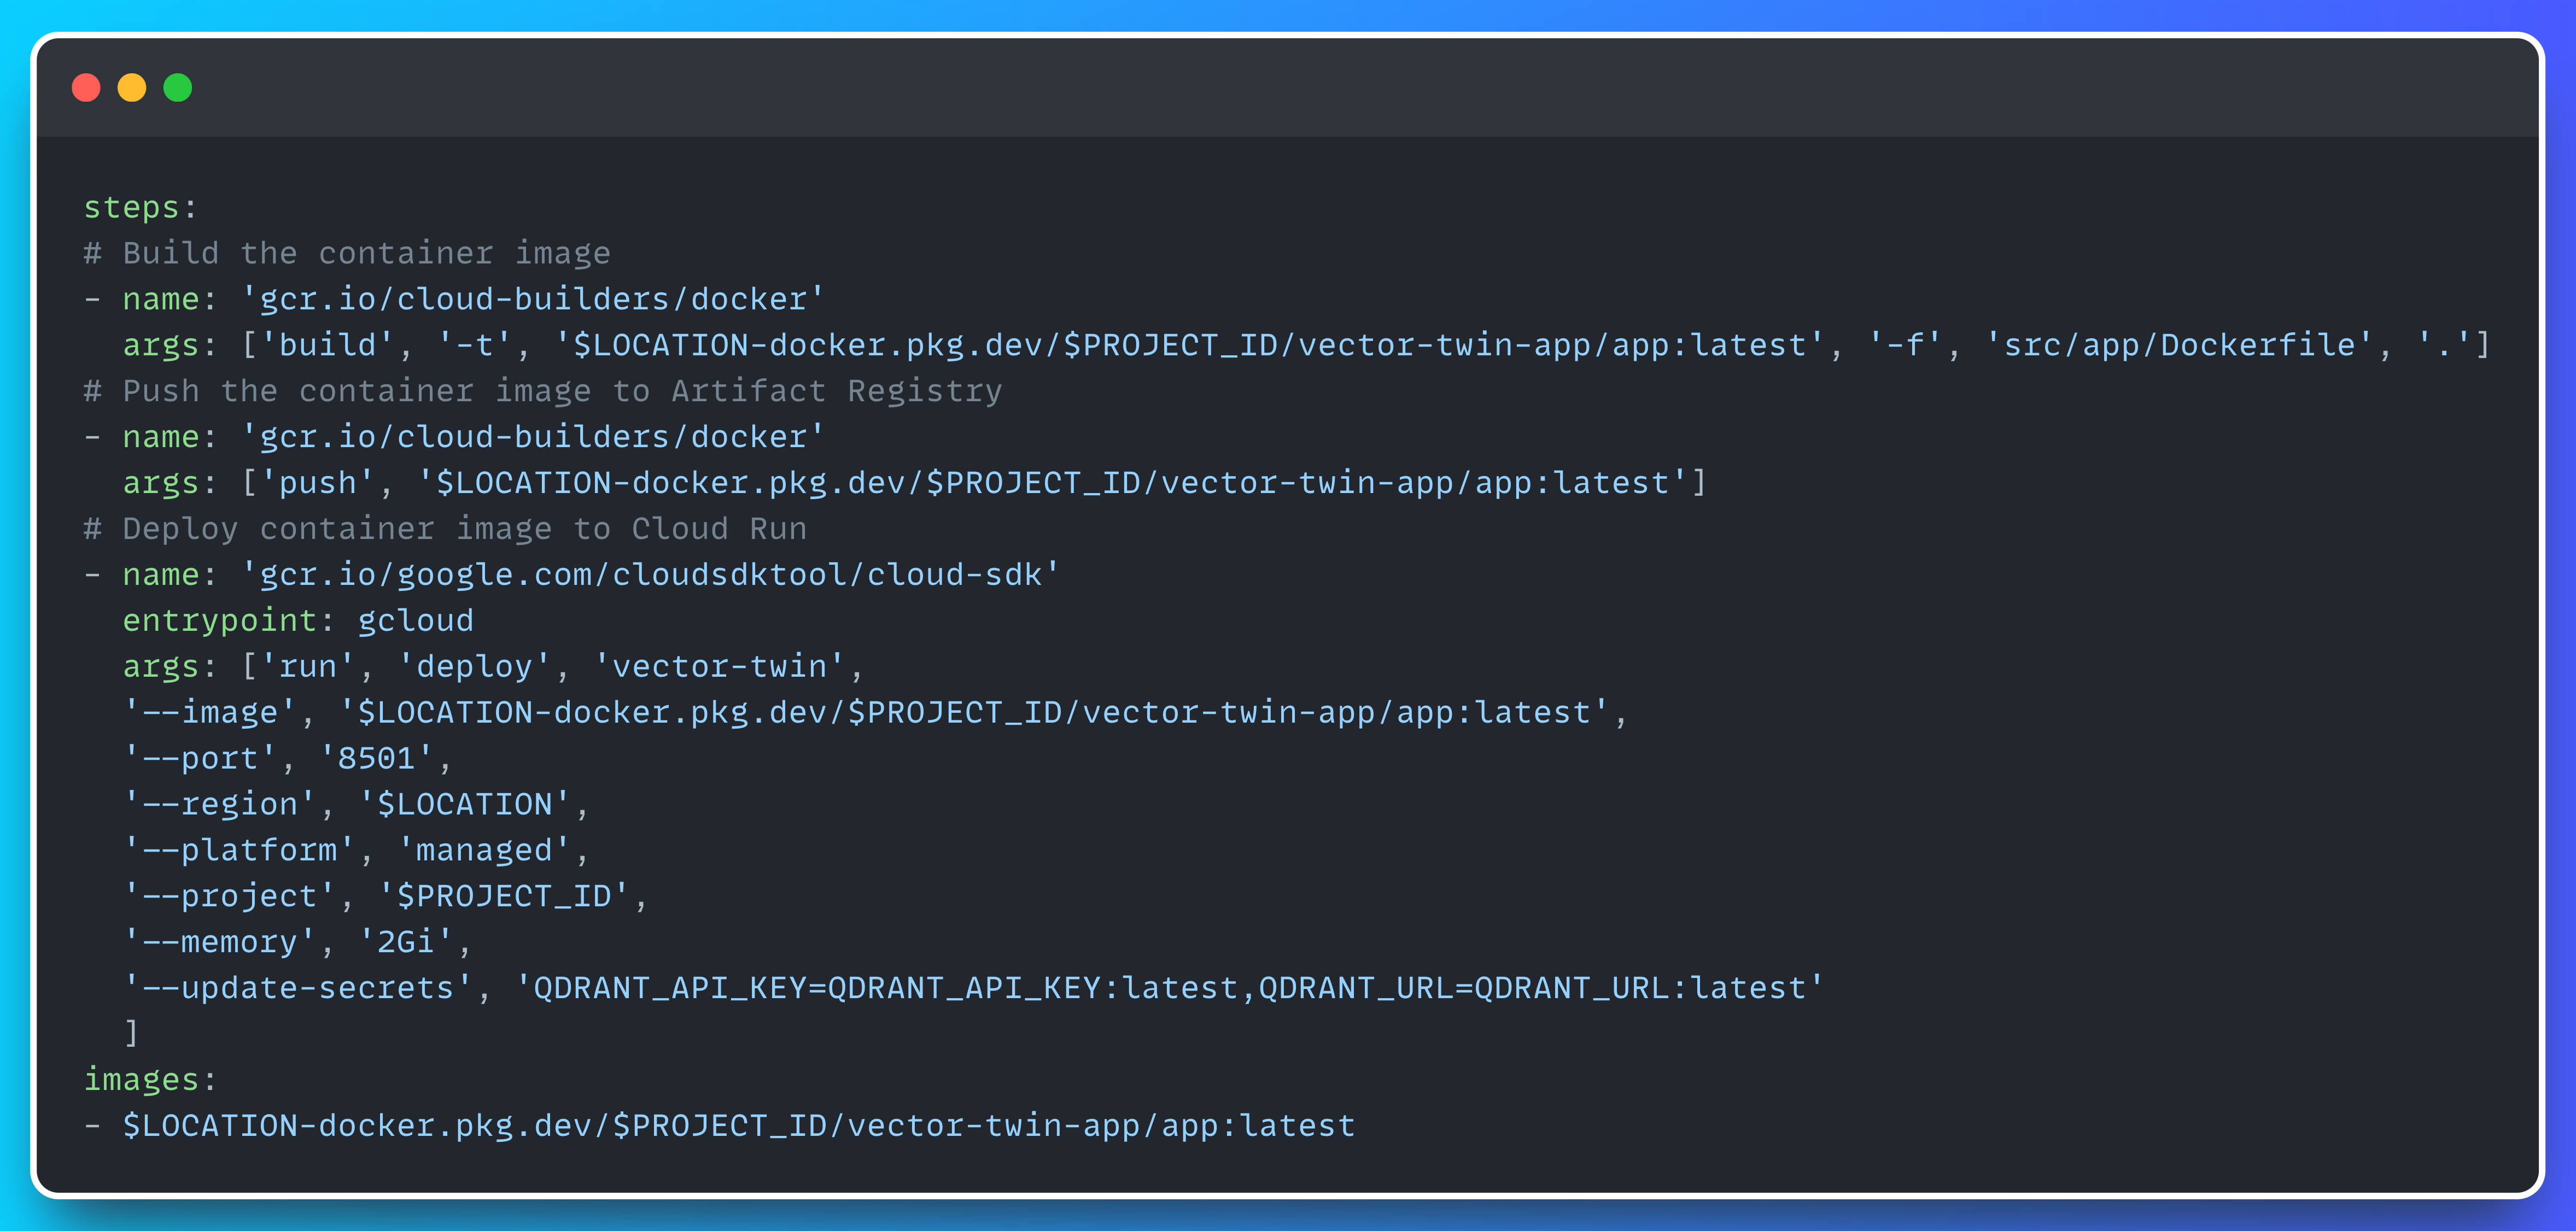
To trigger the Cloud Build Job, just run:
gcloud builds submit --region=<LOCATION>Once the build is complete, you’ll have a Cloud Run service up and running.

If you click the service URL now, you’ll be able to find your celebrity twin!

Before I forget! In case you prefer the video edition … 👇
See you next Wednesday 👋
You really look like "Mr. Andy Samberg". Hope you are not that crazy though 😂