

Programming an Arduino with LLMs
A curious interaction between electronics and AI

While I don’t consider myself an expert in Arduino programming , I really enjoy building electronic projects in my spare time. So I had an idea: I know a few things about AI and a few things about Arduino, so how about making them work together?
Having experimented with CrewAI previously, I came up with the following experiment: connecting CrewAI with Arduino. Additionally, I thought it would be interesting to use some local LLMs, such as those offered by Ollama.
But, before we get started with the code, you might not be familiar with Arduino. So, let’s start with the basics.
You can check the code here!
What is an Arduino?
An Arduino is a small programmable computer that allows you to build your own electronic projects, ranging from basic circuits that blink LEDs to advanced robots capable of moving.
In simple terms, when using the Arduino platform, you need to understand that there are two main “components” to work with.
The Board
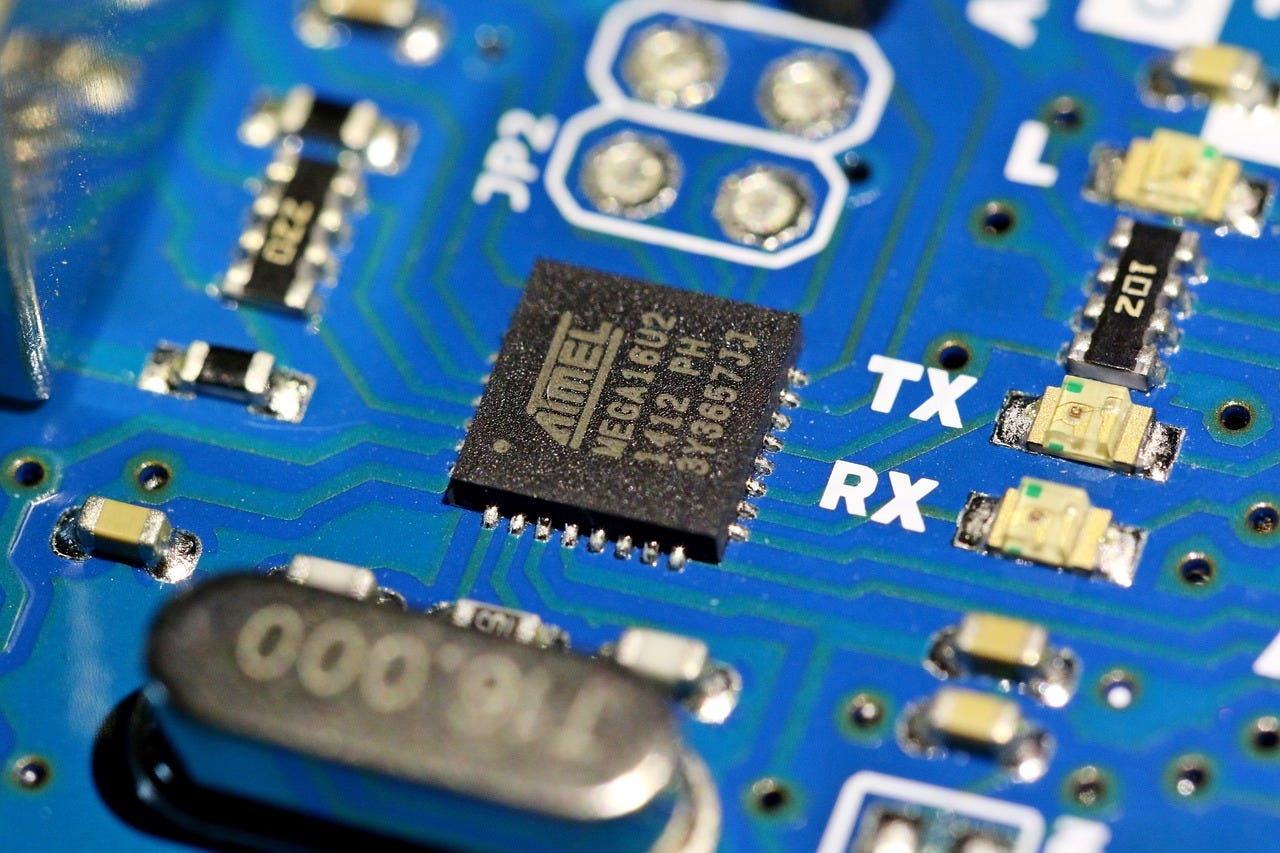
The Arduino board is the physical hardware that holds the microcontroller chip, which is the main component. This chip runs the instructions you provide through your code.
Programming

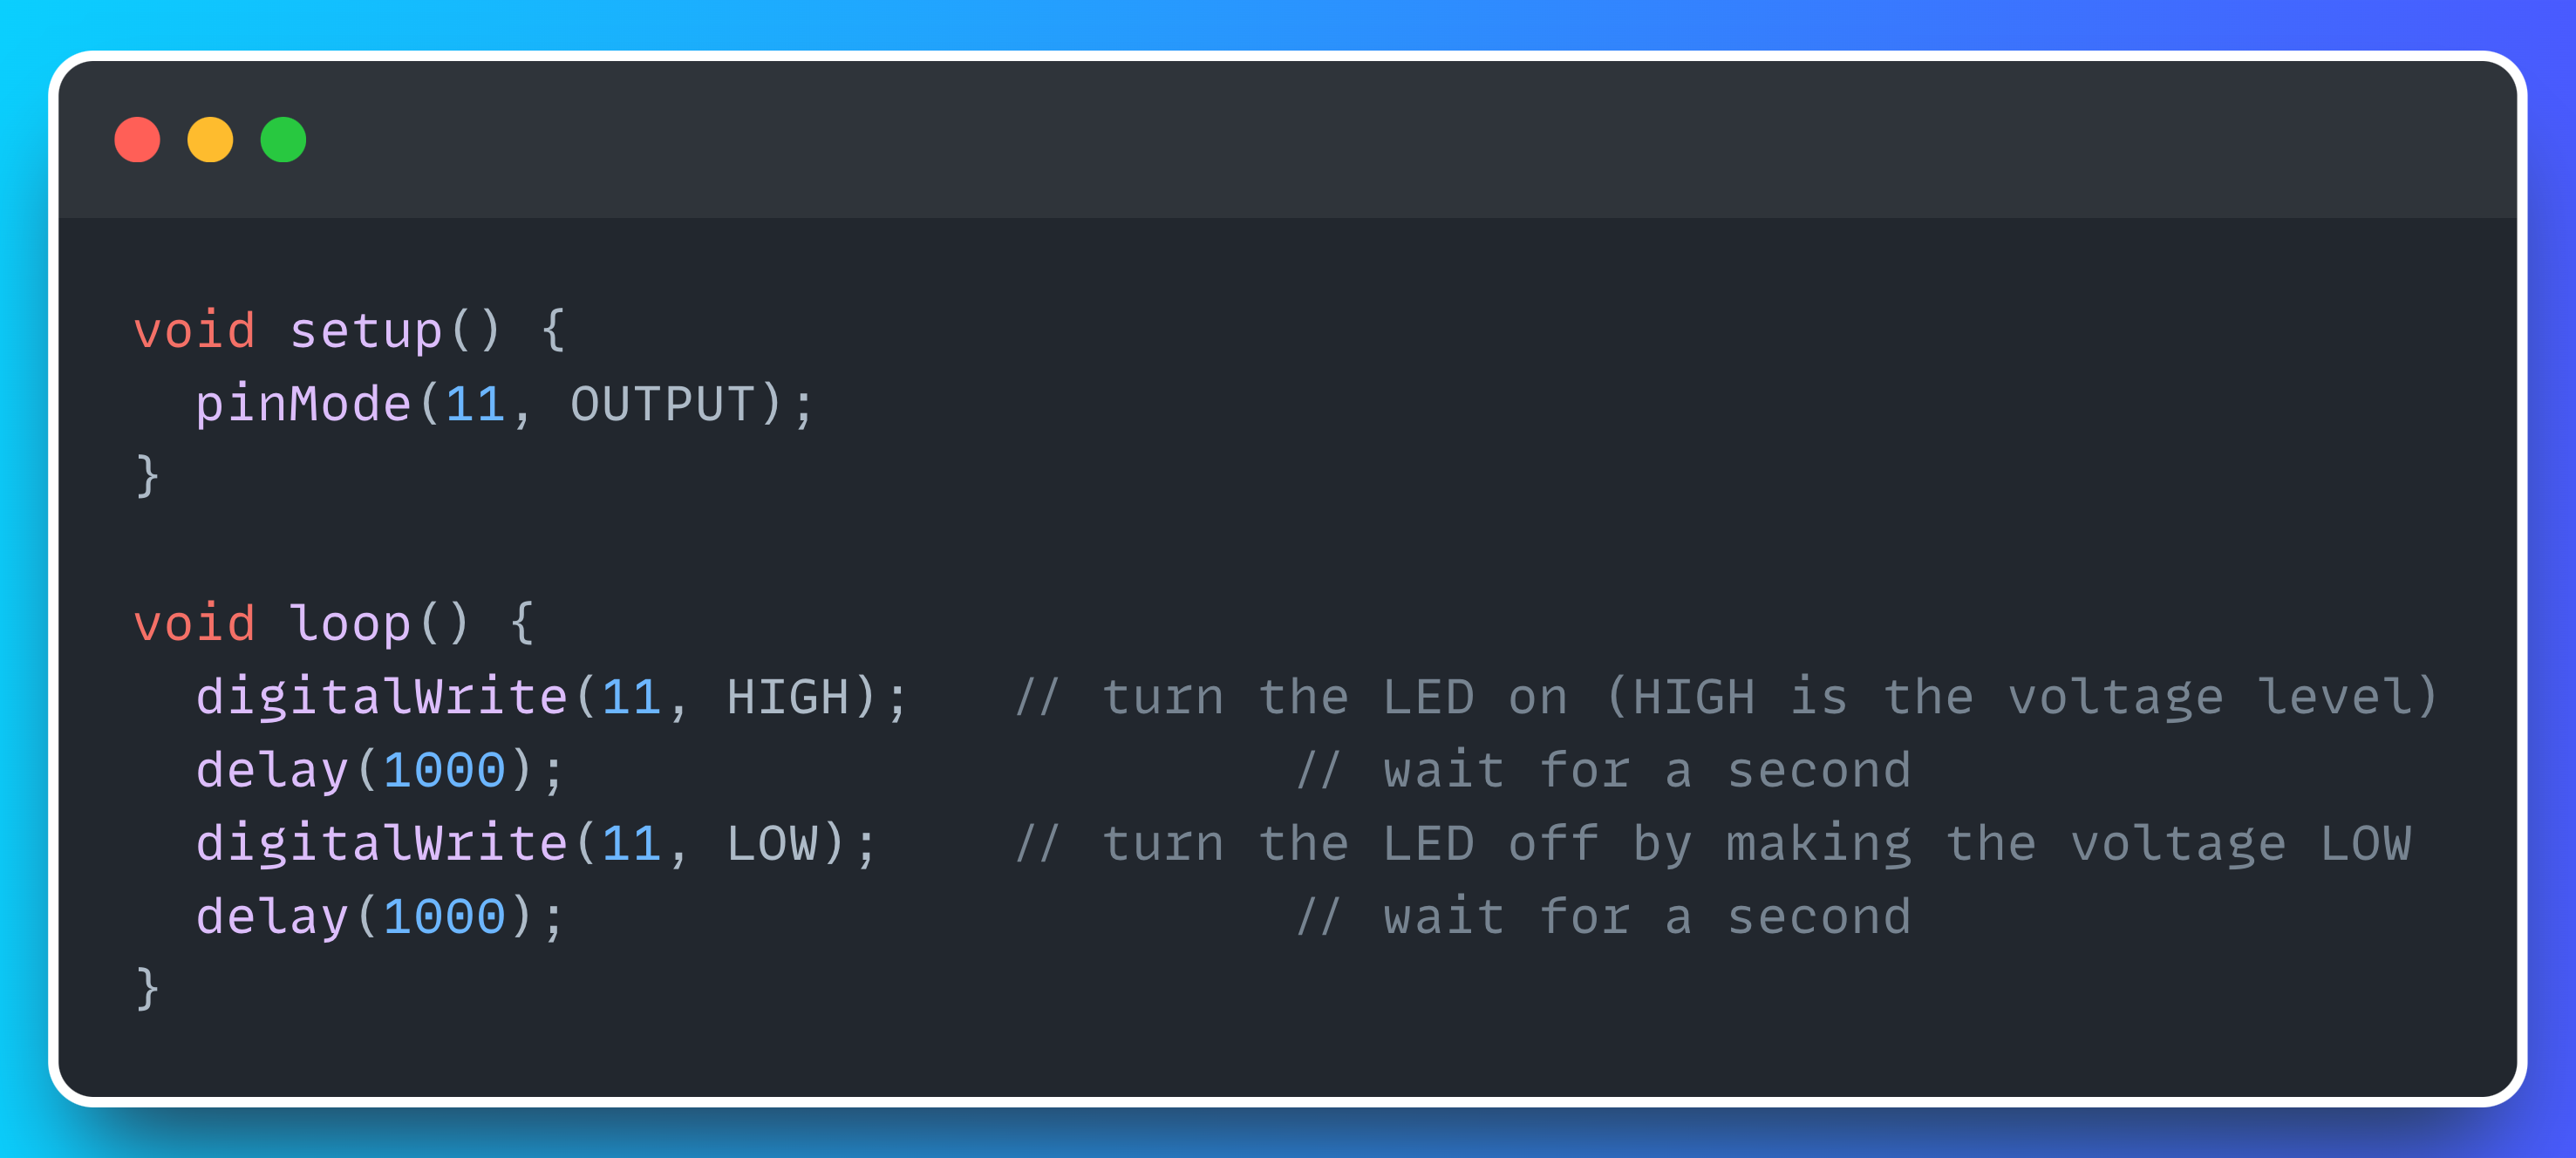
You write code, known as sketches, using the Arduino programming language (based on C / C++). These sketches instruct the Arduino on what actions to take, like turning on a light, reading sensor data, or controlling a servomotor.
For example, this is the sketch for turning on a LED for one second, then off for one second, repeatedly.
I won’t get into the details of sketch programming, as it is beyond the scope of this post, but, if you are interested in this fascinating world, I recommend you to go through the Arduino tutorials.
Building a simple circuit

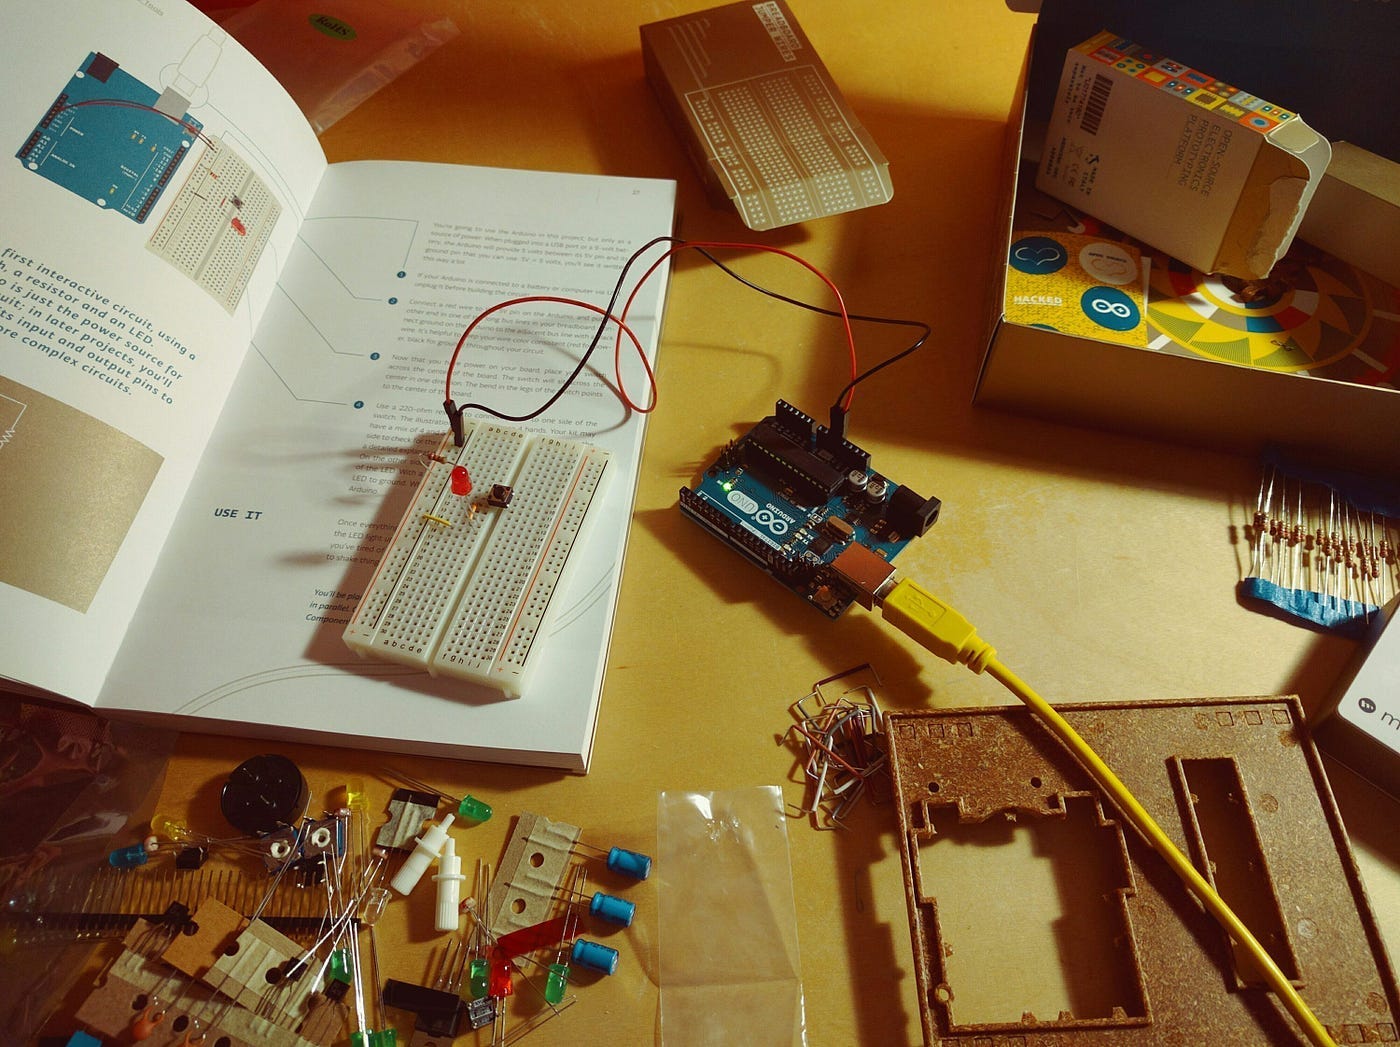
To explore the connection between LLMs and Arduino, I selected a simple project: making three LEDs blink in a loop. You can see the circuit setup in the image above.
Now that the circuit is set up, the next logical step would be to manually write a sketch to control the LEDs. However, that’s exactly what we want to automate using LLMs!
So, instead of writing the code ourselves, we’ll have a CrewAI agent handle the programming. Likewise, instead of manually compiling and uploading the code to the Arduino, another CrewAI agent will take care of that process for us.
Implementing the Crew of Agents
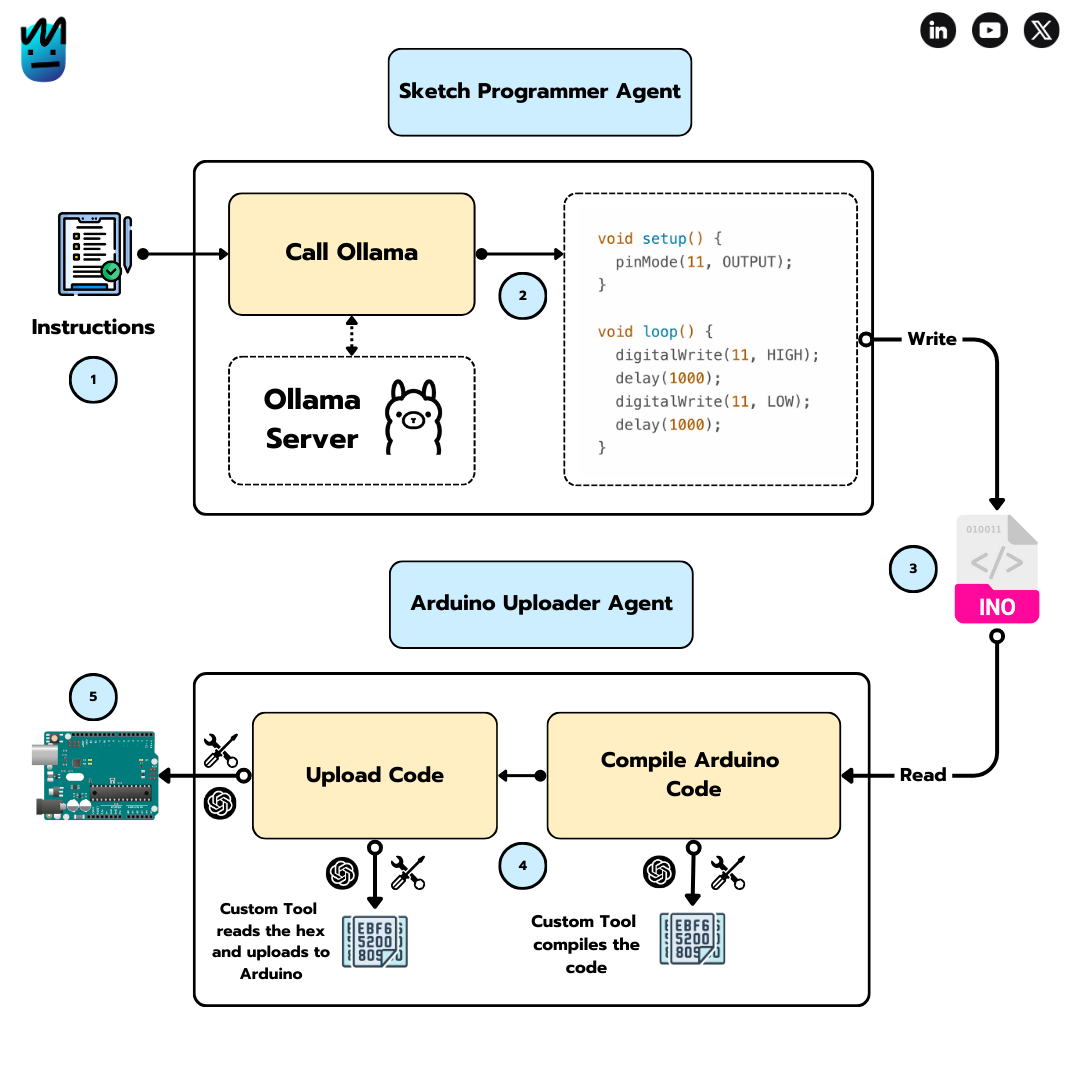
Let’s focus on the diagram above, which outlines the CrewAI application we’re about to build.
As you can see, the setup is simple, consisting of two agents: the Sketch Programmer Agent and the Arduino Uploader Agent. The first agent will receive a description of the circuit and its expected behaviour, then generate a sketch file — which has a .ino extension. The second agent will compile the generated sketch and upload the code to the Arduino.
Let’s examine each agent in detail.
Sketch Programmer Agent
Earlier in this post, I mentioned that we’d be using local LLMs. For this purpose, we’ll be working with Ollama.
Note that I’m using the Llama 3 model. If you want to do the same, make sure it’s downloaded in Ollama. If it’s not, you can download it by running this simple command.
ollama pull llama3Now, it’s time to show you the agent implementation.

The agent’s goal includes information about the circuit we’ve implemented, as well as its intended behaviour. Additionally, you’ll notice that the agent is using llama3 as the LLM.
The task assigned to this agent is the following.
Pay attention to the output_file attribute. This is crucial, as the Sketch Programmer Agent will save the generated code to the ./tmp/tmp.ino file.
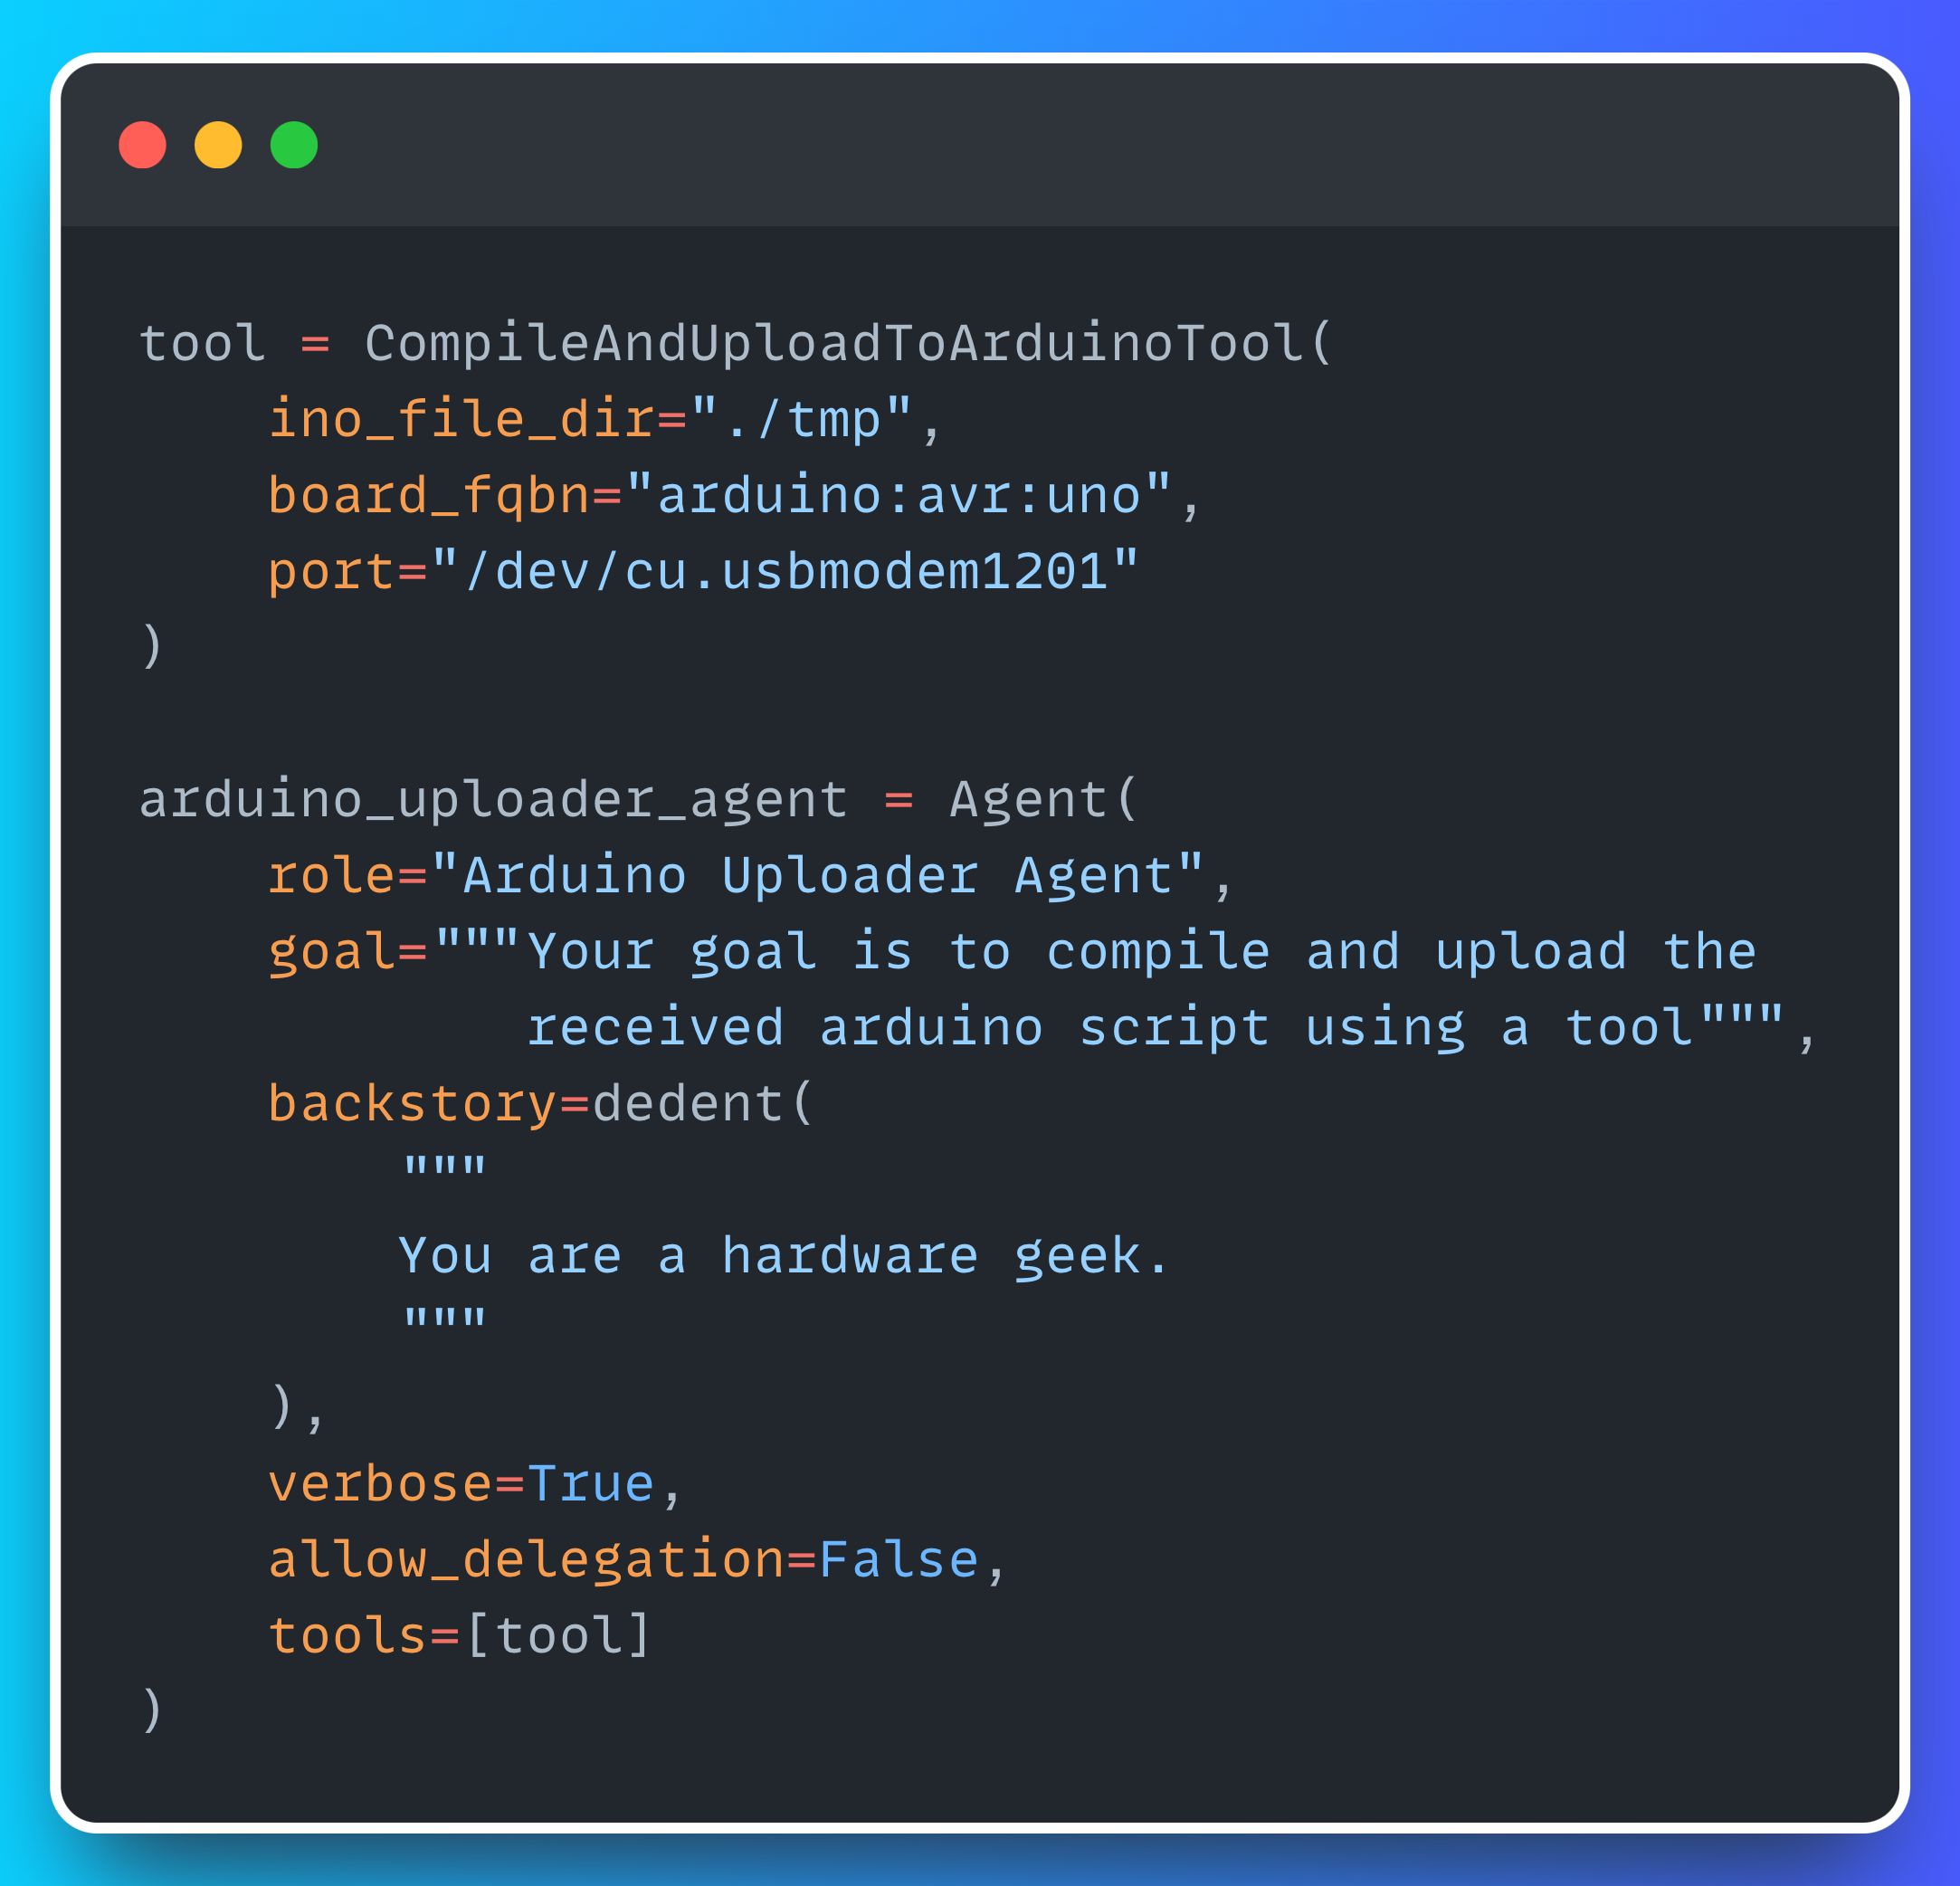
Arduino Uploader Agent
Now that the previous agent has generated the sketch file, the Arduino Uploader Agent needs to compile it and upload it to the Arduino. How can we achieve this?
The solution is to use a custom tool.
You can learn how to implement your own custom tools following this CrewAI documentation
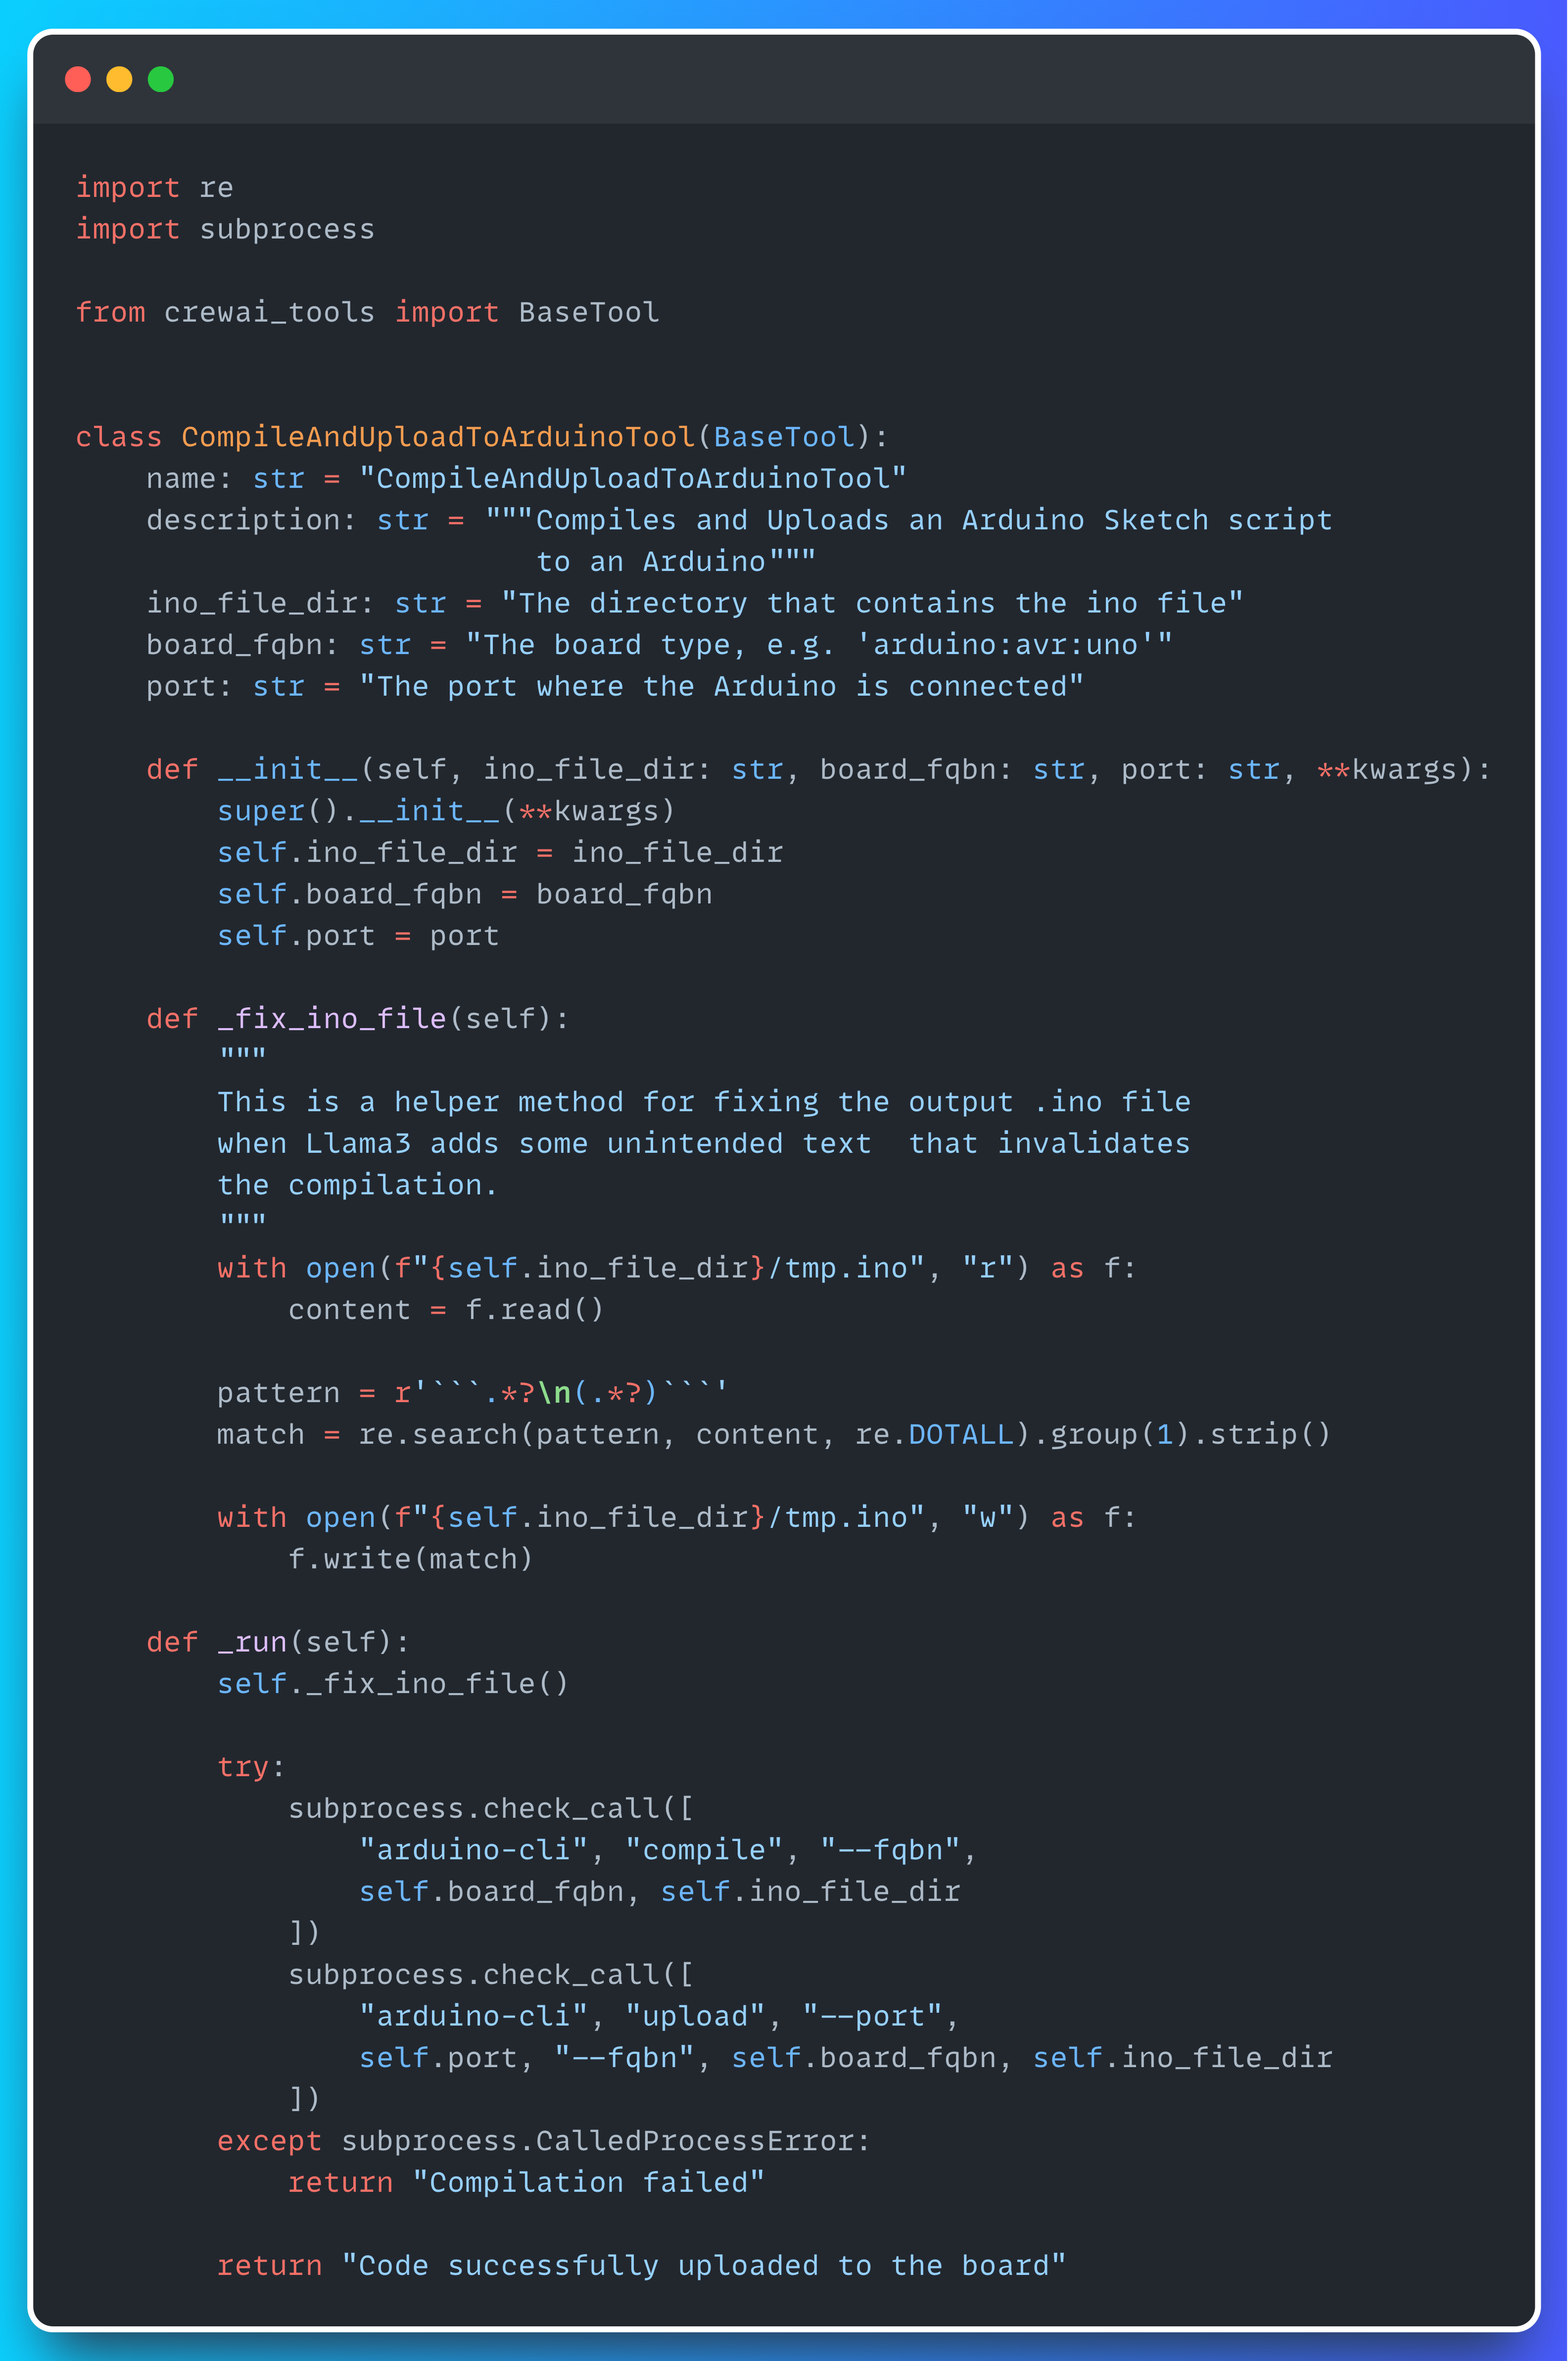
This tool expects three arguments:
ino_file_dir: The directory containing the sketch. Remember we were using the tmp dir.
board_fqbn: The board type. I’m using an Arduino UNO, so my board type is arduino:avr:uno, but it may be different in your case.
port: The port where the Arduino is connected. Mine is connected to port /dev/cu.usbmodem1201.
When the agent uses the tool (by accessing the _run method), it will compile the code and then upload it to the Arduino. You can check the agent implementation below — in this case I’ve used GPT-4 since it works much better when using tools:
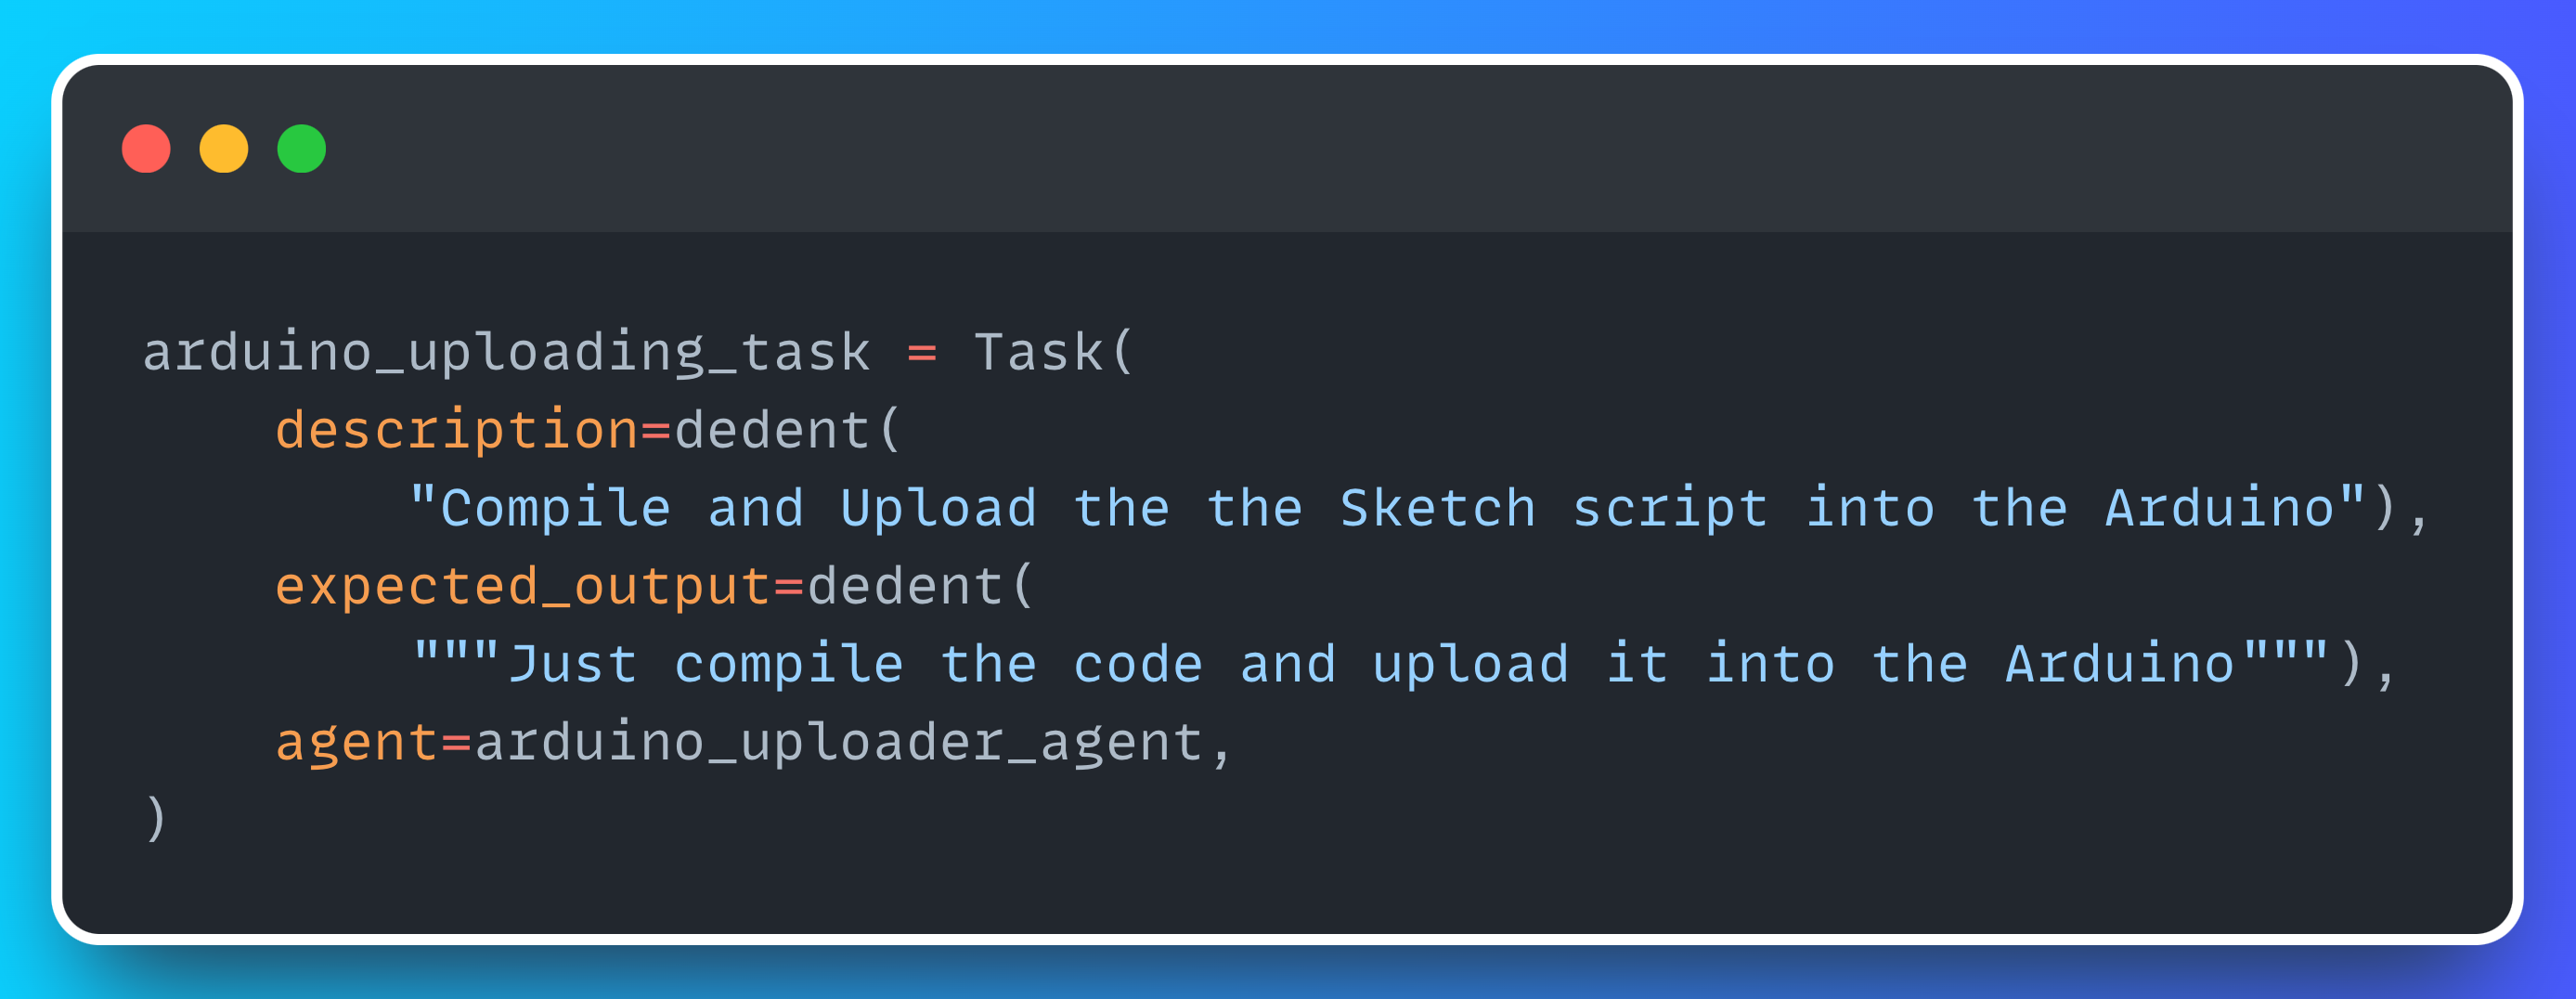
And this is the task assigned to the agent.
Results
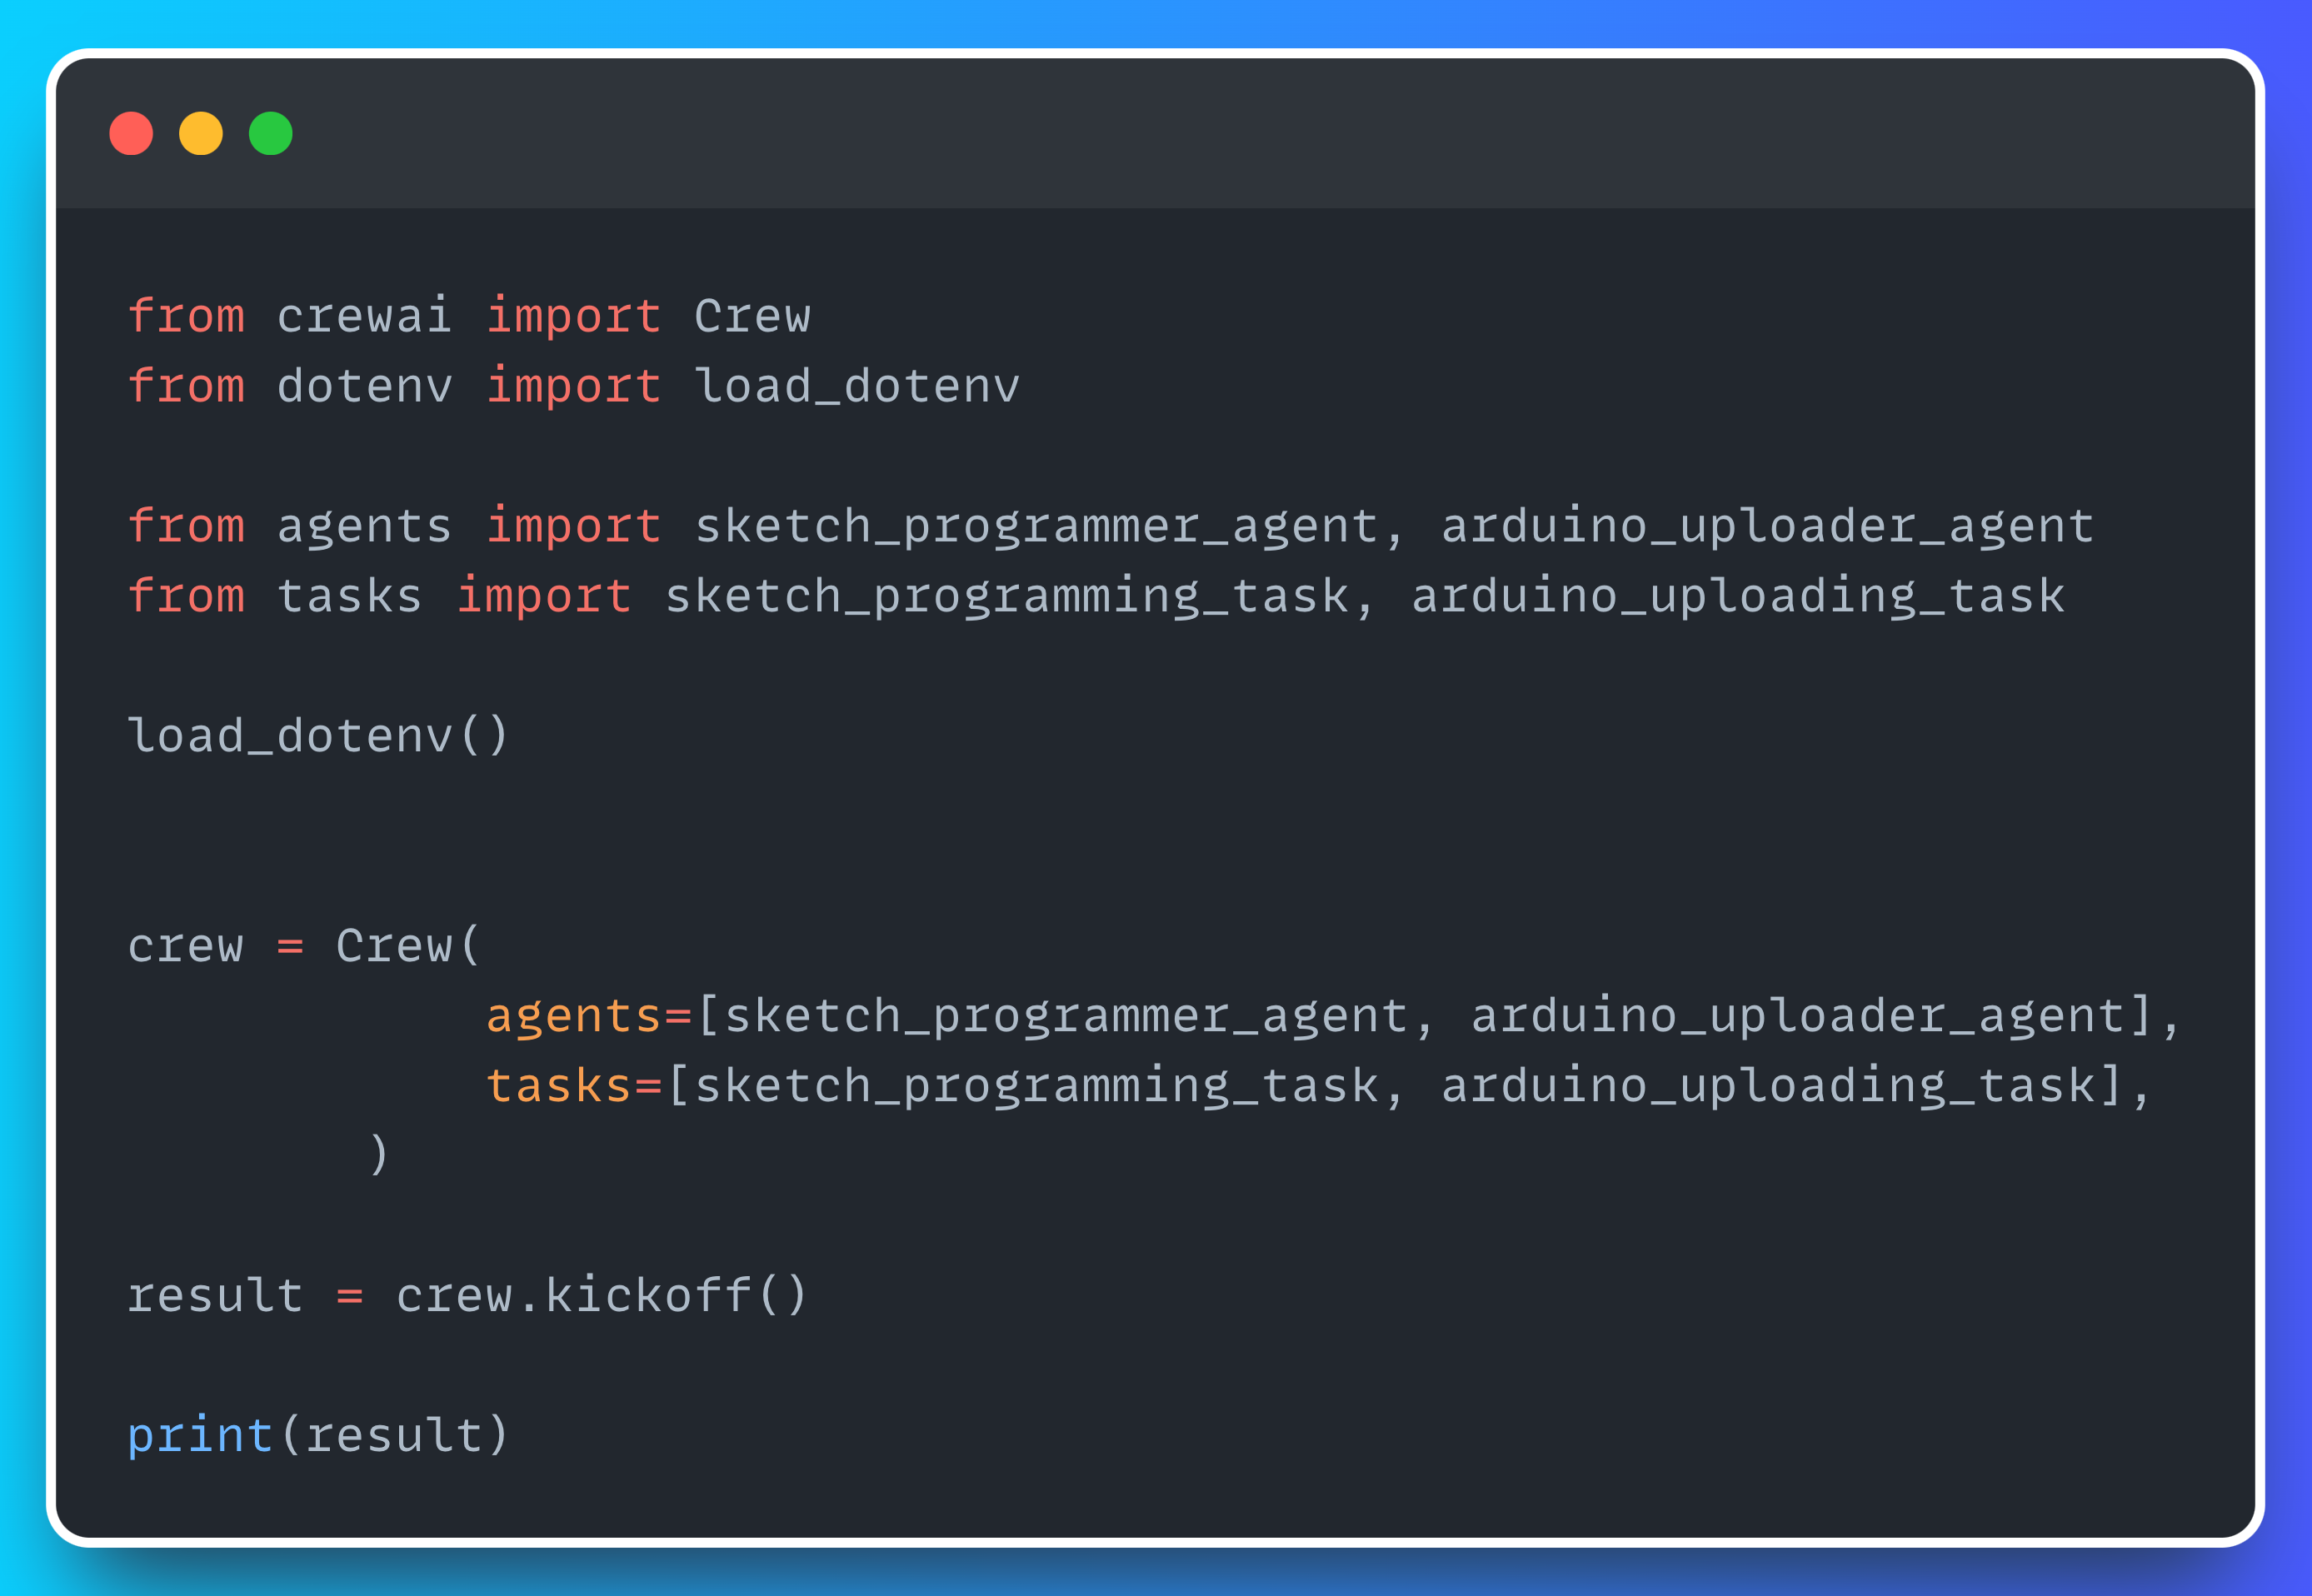
It took some time, but we’ve now assembled all the components needed to build our CrewAI application. It’s time to build the Crew.
If you’d like to see the agents in action, you can check out my experiment in the following video. It also features a step-by-step explanation of everything covered in this article so, if you found it helpful, give it a try!
And by the way … Happy 2025!!! 🎉🎉🎉
Amazing project idea 🤟