

Dissecting Ava's brain
Lesson 2: Mastering LangGraph Workflows

Picture this: you’re a mad scientist living in a creepy old house in the middle of the forest, and your mission is to build a sentient robot. What’s the first thing you’d do?
Yep, you’d start with the brain, right? 🧠
Now, don’t worry - neither Jesús nor I are actually mad (though, as a physicist, I might be a little questionable). But when we started building Ava, we also kicked things off with the “brain”.
And that’s exactly what Lesson 2 is all about - building Ava’s brain using LangGraph! 🕸️

This is the second lesson of “Ava: The Whatsapp Agent” course. This lesson builds on the theory and code covered in the previous ones, so be sure to check them out if you haven’t already!
LangGraph in a Nutshell
Never used LangGraph before? No worries, here’s a quick intro.
LangGraph models agent workflows as graphs, using three main components:
🔶 State - A shared data structure that tracks the current status of your app (workflow).
🔶 Nodes - Python functions that define the agent behaviour. They take in the current state, perform actions, and return the updated state.
🔶 Edges - Python functions that decide which Node runs next based on the State, allowing for conditional or fixed transitions (we’ll see an example of conditional edge later 😉)
By combining Nodes and Edges, you can build dynamic workflows, like Ava! In the next section, we’ll take a look at Ava’s graph and its Nodes and Edges.
Let’s go! 👇
If you want something more complete, I recommend you to check this LangChain Academy course: Introduction to LangGraph.
Ava’s graph
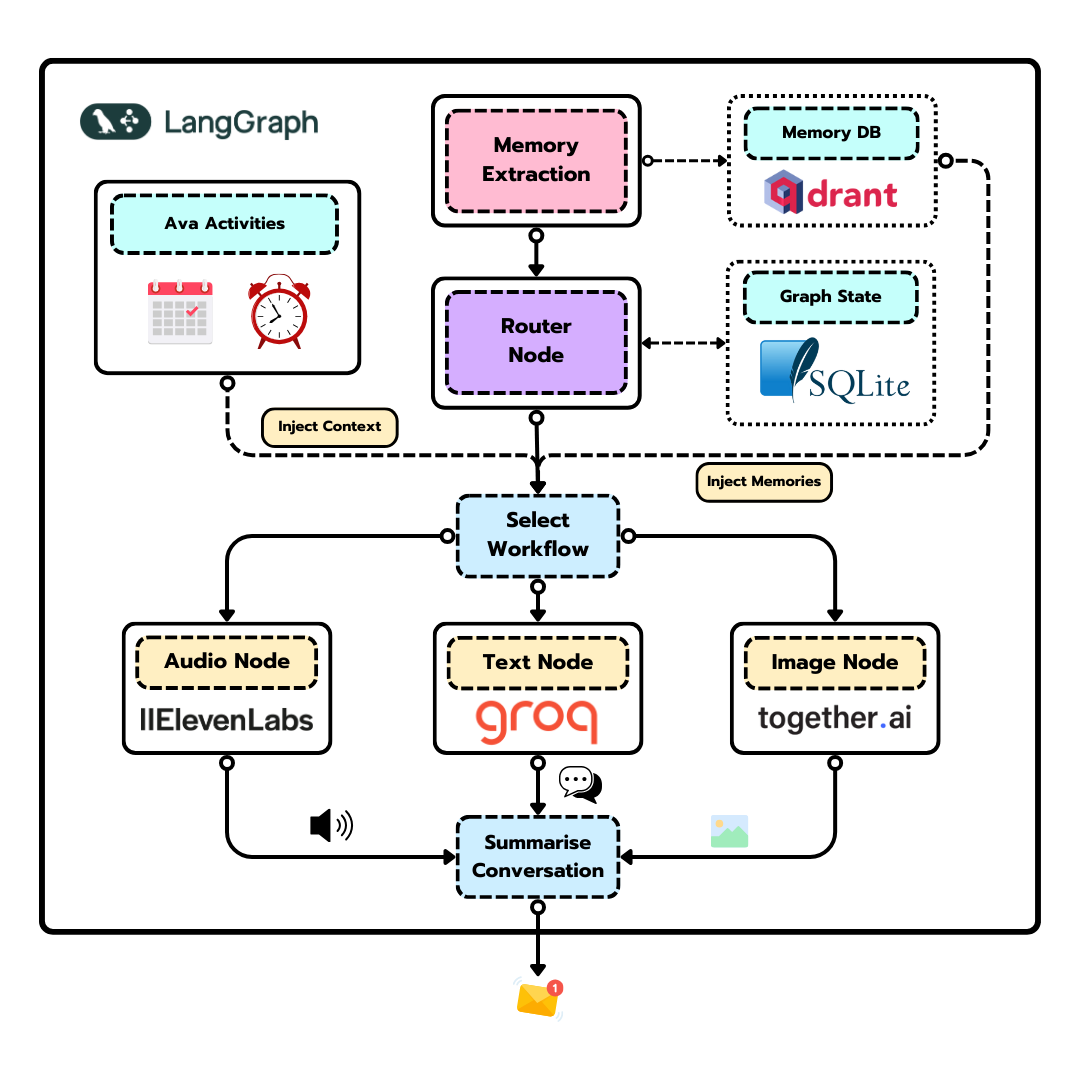
If you want to see the full graph implementation, take a look here.
Before we get into the Nodes and the Edges, let’s describe Ava’s state.
💠 Ava State
As we mentioned earlier, LangGraph keeps track of your app's current status using the State. Ava’s state has these attributes:
summary - The summary of the conversation so far (more on this in Lesson 3)
workflow - The current workflow Ava is in. Can be “conversation”, “image” or “audio”. More on this when we talk about the Router Node.
audio_buffer - The buffer containing audio data for voice messages. This is something we’ll cover in Lesson 4.
image_path - Path to the current image being generated. More about this in Lesson 5.
current_activity - Description of Ava’s current simulated activity.
apply_activity - Flag indicating whether to apply or update the current activity.

This state will be saved in an external database. We went with SQLite3 for simplicity -we’ll get into the details in the next lesson when we cover Ava’s short-term memory.
Now that we know how Ava’s State is set up, let’s check out the nodes and edges.
💠 Memory Extraction Node
The first node of the graph is the memory extraction node. This node will take care of extracting relevant information from the user conversation (e.g. name, age, background, etc.) We will explain this node in detail in the next lesson, when we explore the memory modules.
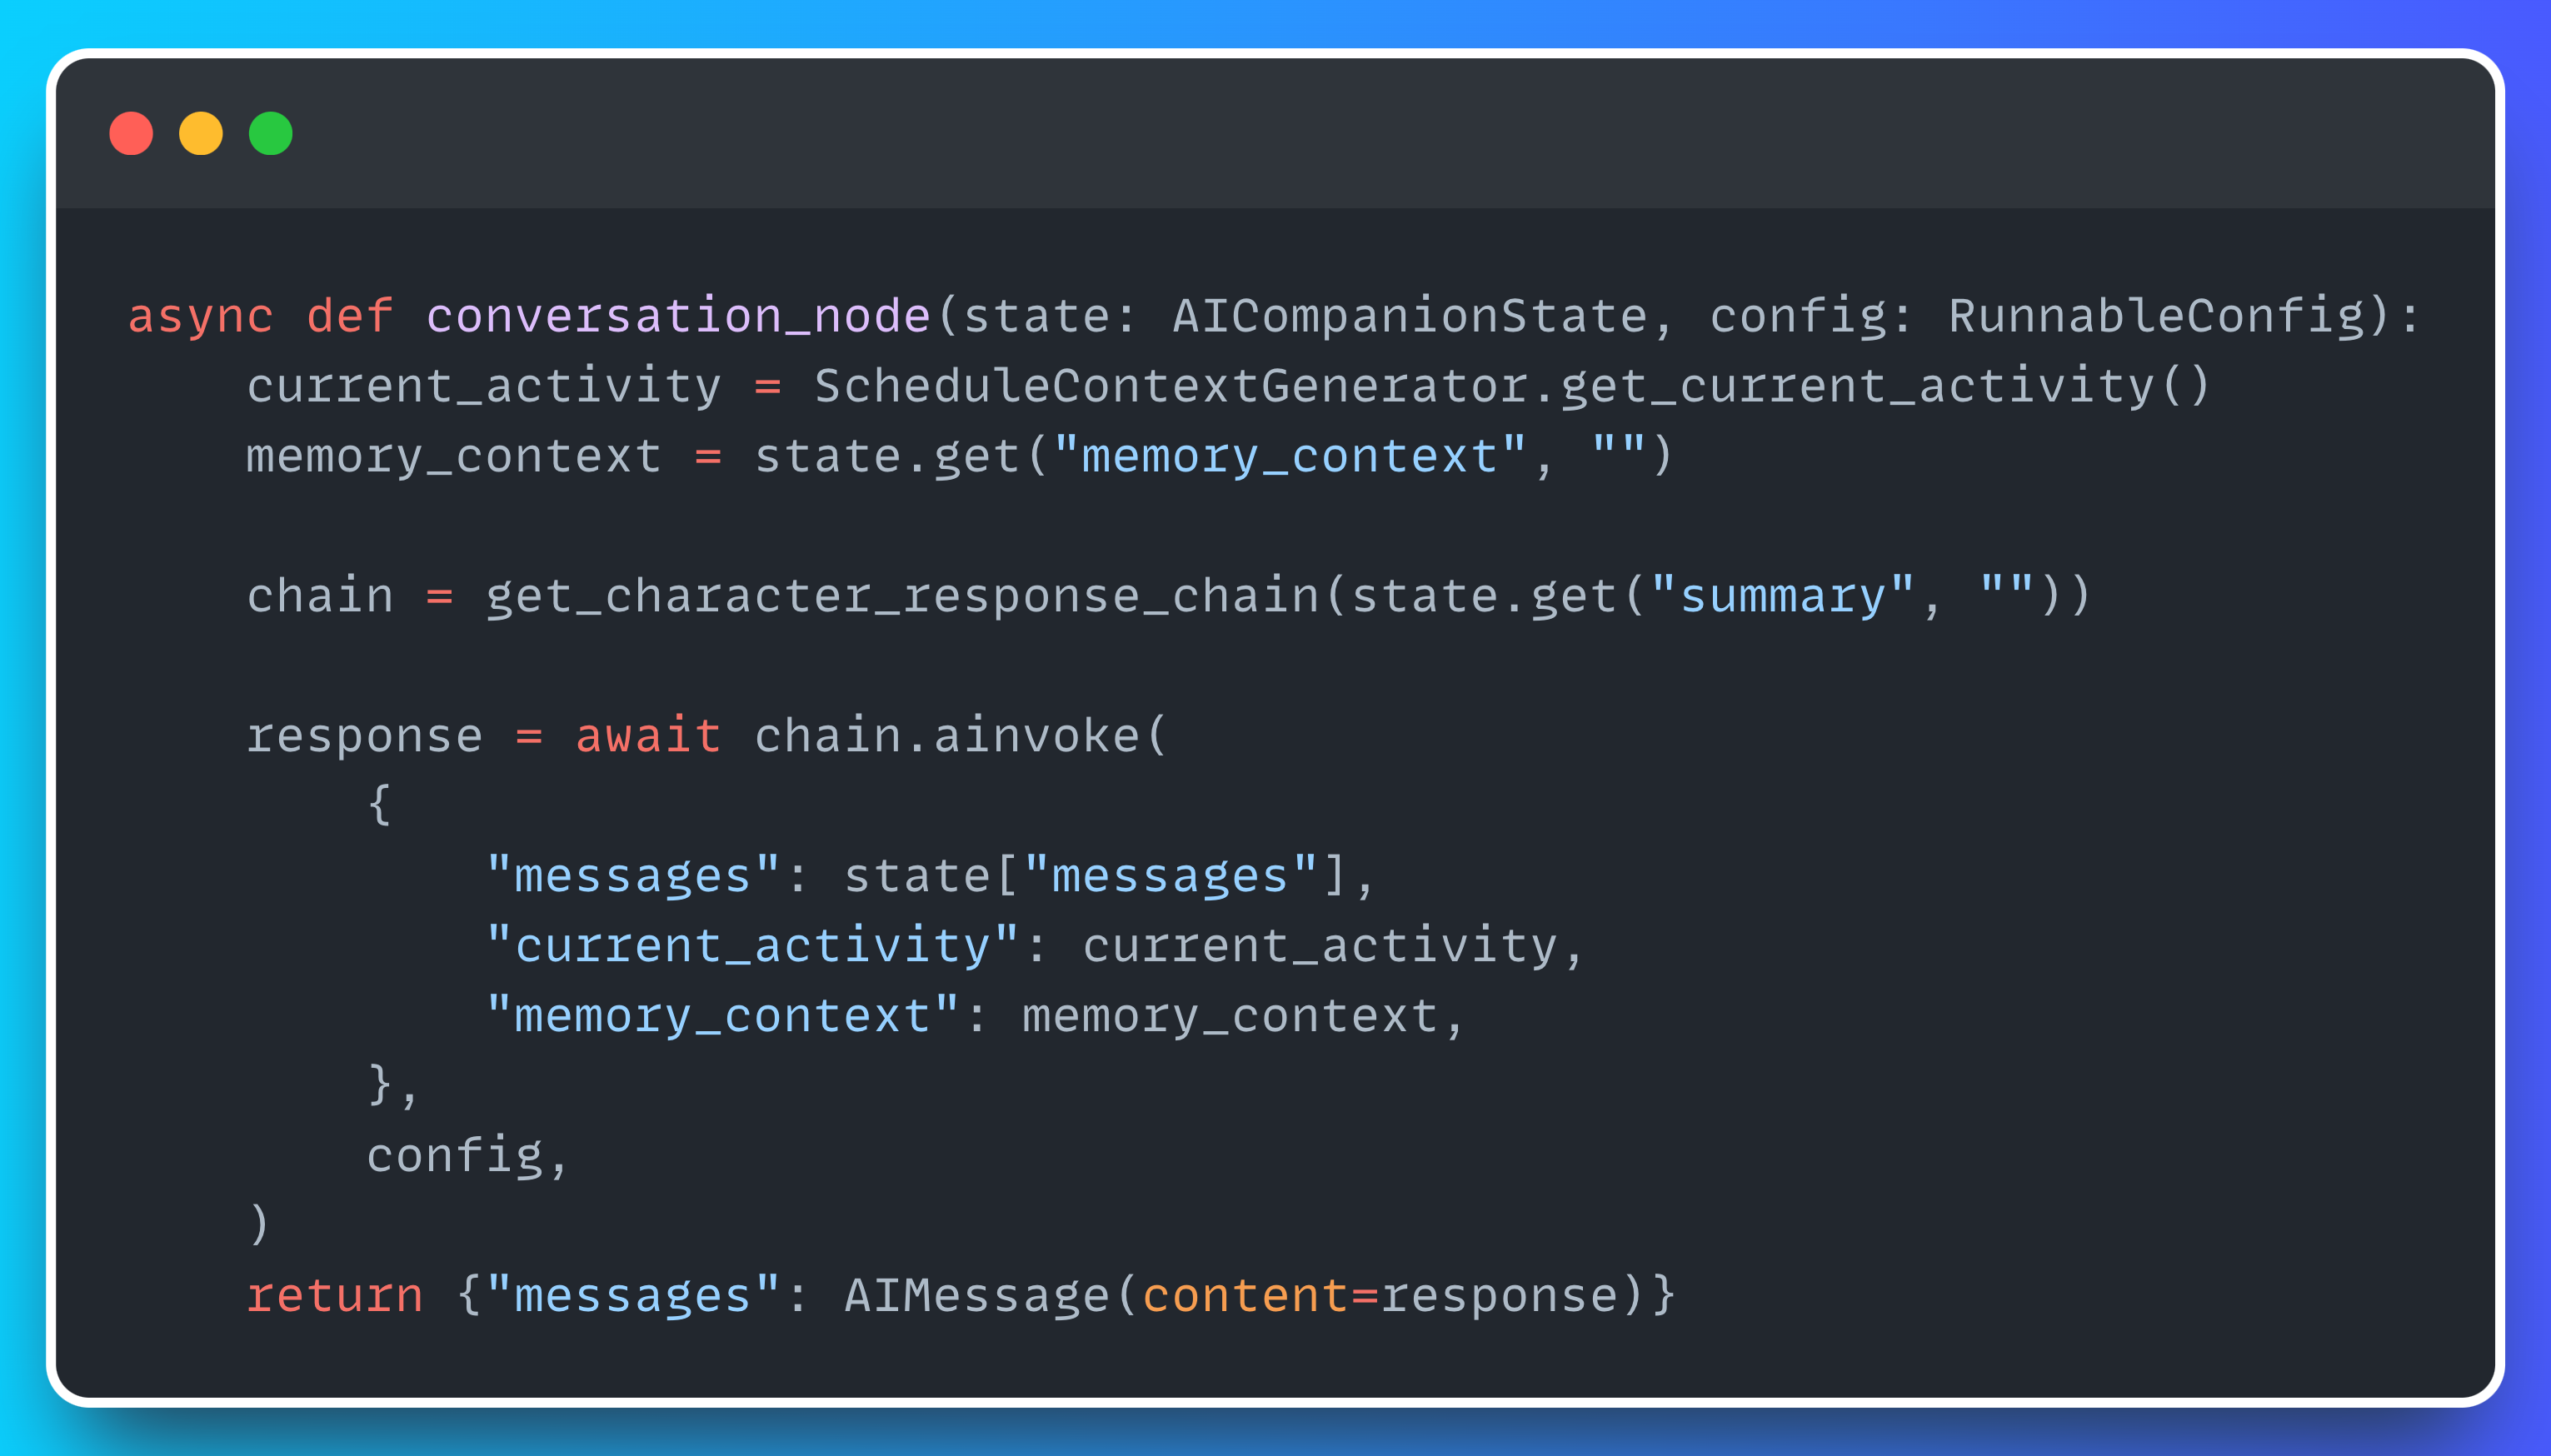
💠 Context Injection Node
To appear like a real person, Ava needs to do more than just chat with you. That’s why we need a node that checks your local time and matches it with Ava’s schedule. This is handled by the ScheduleContextGenerator class, which you can see in action below.

💠 Router Node

The router node is at the heart of Ava’s workflow. It determines which workflow Ava’s response should follow - audio (for audio responses), image (for visual responses) or conversation (regular text replies).

The logic behind this router is pretty straightforward - we’re just creating a chain with a structured output (RouterResponse). You can check out the System prompt we are using for this task here.
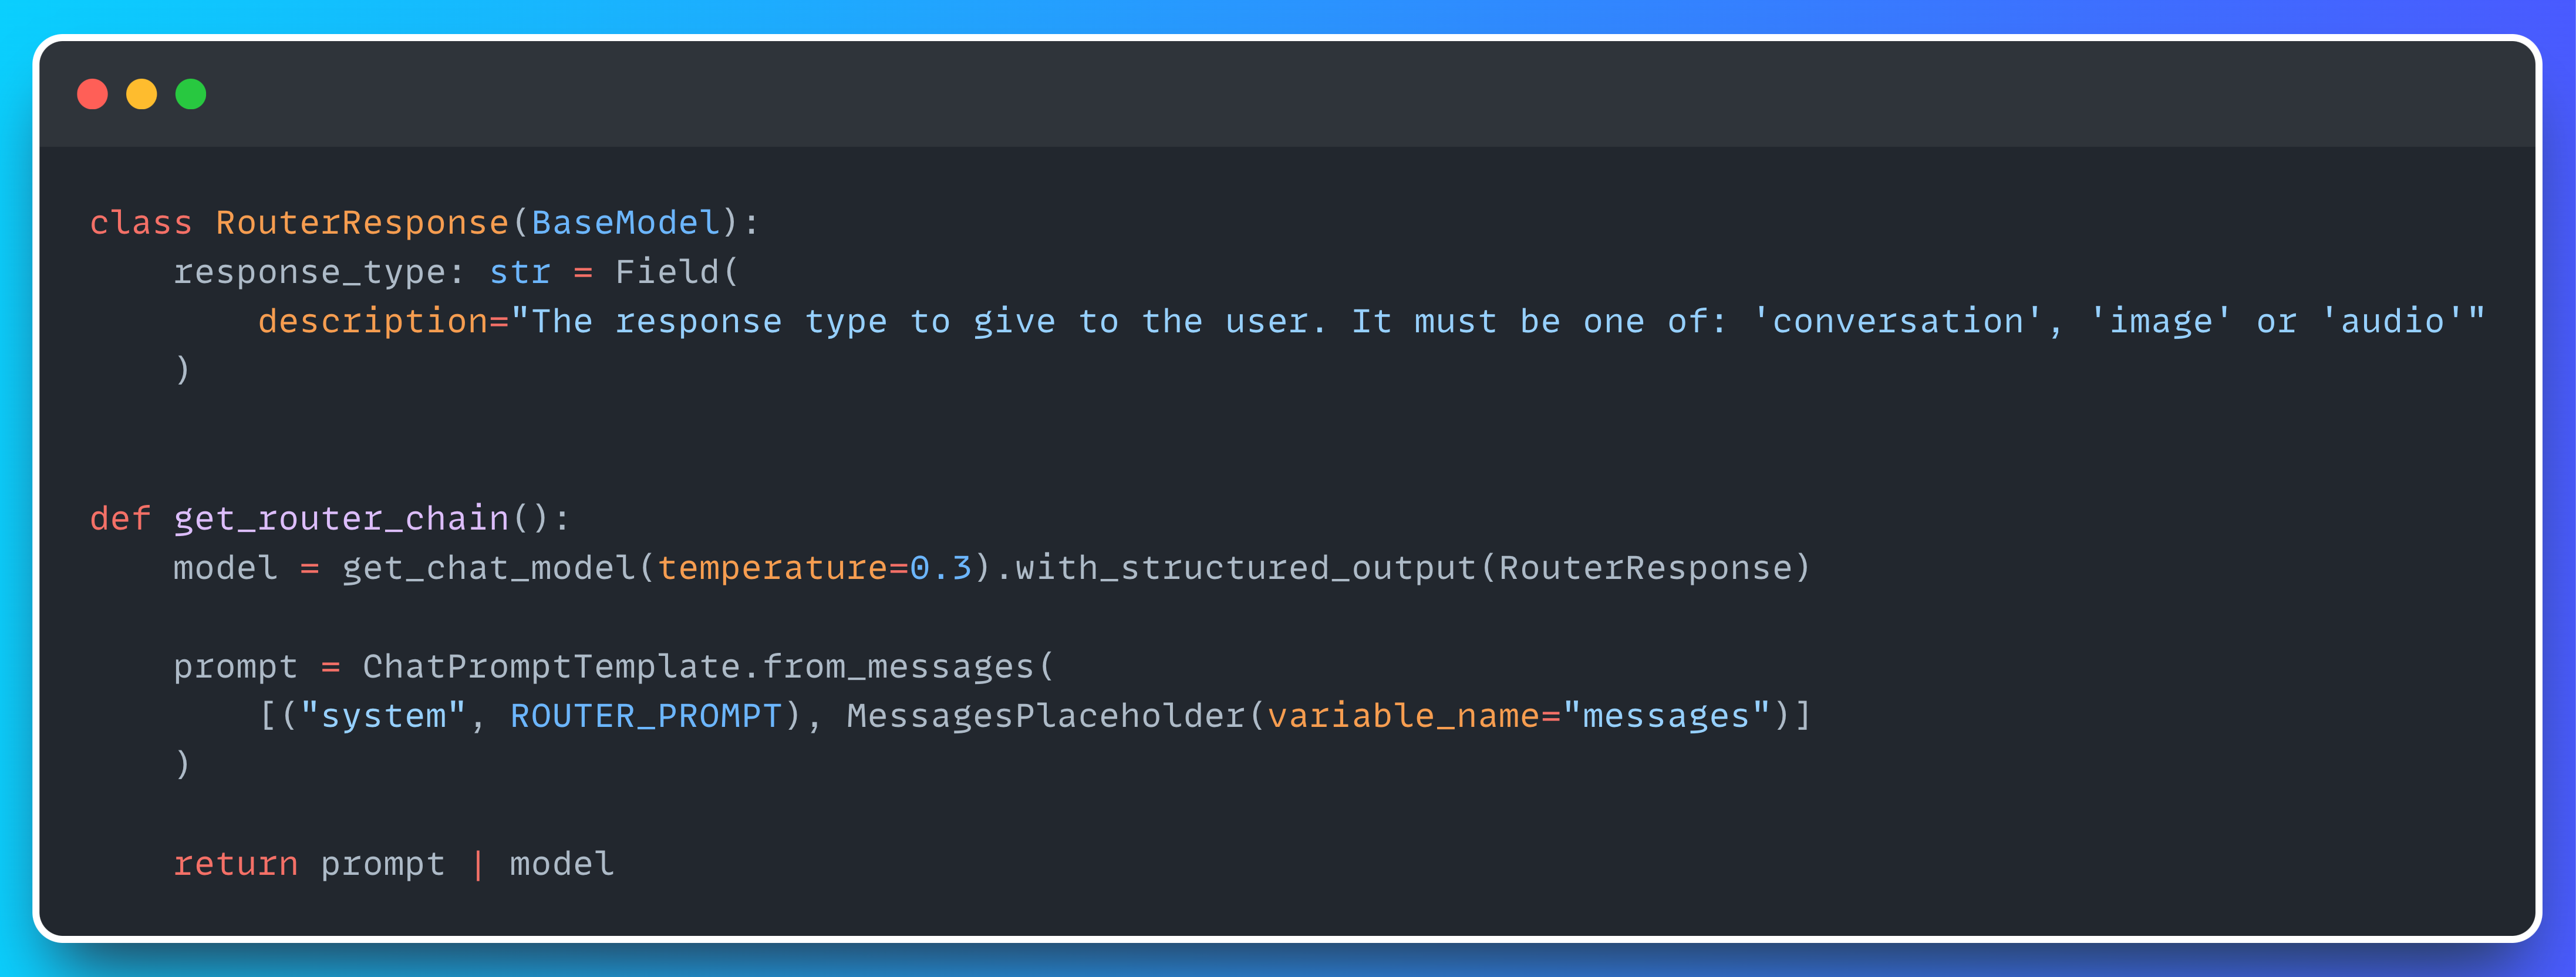
Once the Router Node determines the final answer, the chosen workflow is assigned to the “workflow” attribute of the AICompanionState. This information is then used by the select_workflow edge, which connects the router node to either the image, audio or conversation nodes.

Both the image node and the audio node will be covered in future lessons. As for the conversation one (plain text), there’s not much to elaborate on. It simply creates a conversational chain that takes the summary and uses Ava’s character card prompt to generate a response.
💠 Summarization Node
One challenge with long conversations is the huge number of messages that need to be stored in memory. To fix this, we’re using an extra node - a summarization node.
Basically, this node takes the conversation, sums it up, and adds the summary as a new attribute in the state. Then, whenever Ava generates a new response, this summary gets used in the System Prompt.

But of course, we don’t want to generate a summary every single time Ava gets a message. That’s why this node is connected to the previous ones with a conditional edge.

As you can see in the implementation above, this edge connects the summarization node to the previous nodes if the total number of messages exceeds the TOTAL_MESSAGES_SUMMARY_TRIGGER (which is set to 20 by default). If not, it will connect to the END node, which marks the end of the workflow.

And that’s all for today!
Just a reminder - Lesson 3 will be available next Wednesday, February 19th. And don’t forget there’s also a complementary video lesson on Jesús Copado’s YouTube channel.
We strongly recommend exploring both resources (written lessons and video lessons) to maximize your learning experience! 🙂
Ava wishes you a wonderful week! 👋
Excelente artículo! Muchas gracias Miguel. Estoy atento a toda la saga!
Top-notch article!
I love that you've added so many code snippets! 🔥